Wood Shingle Siding A Complete Guide
Wood shingle siding: the timeless charm of natural wood cladding elevates any home. From the rich textures of cedar to the durability of redwood, choosing the right wood shingle siding involves careful consideration of various factors. This guide dives deep into the selection process, installation techniques, maintenance strategies, and aesthetic possibilities, empowering you to make informed decisions for your project.
We’ll explore the diverse types of wood shingles, their unique properties, and the costs associated with each. We’ll then delve into the practical aspects of installation, covering everything from proper preparation and nailing techniques to ensuring optimal ventilation and flashing. Maintenance, repairs, and the aesthetic integration of wood shingle siding into your home’s overall design will also be thoroughly examined. By the end, you’ll have the knowledge to confidently choose and install wood shingle siding that enhances your home’s beauty and longevity.
Types of Wood Shingle Siding
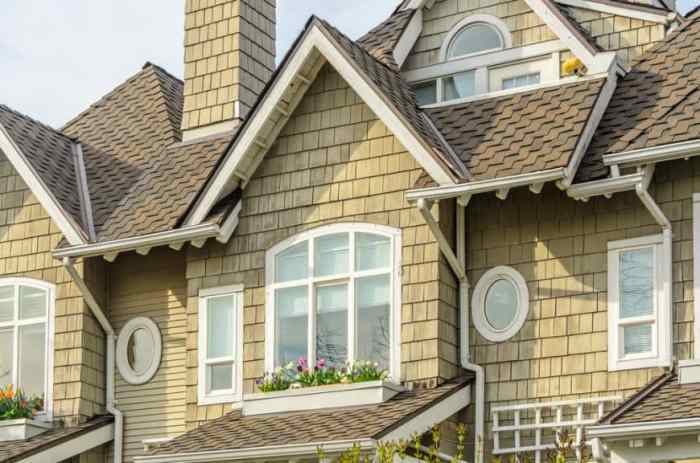
Choosing the right wood shingle siding can significantly impact your home’s aesthetic appeal, durability, and overall cost. Understanding the various types of wood and shingle profiles available is crucial for making an informed decision that aligns with your budget and long-term goals. This section will delve into the specifics of different wood shingle options, allowing you to weigh the pros and cons before selecting the perfect siding for your project.
Wood Types for Shingle Siding
Several wood species are commonly used for shingle siding, each offering a unique combination of properties. The most popular choices include cedar, redwood, and cypress, each distinguished by its grain, durability, and natural resistance to decay. The selection often comes down to budget, desired aesthetic, and the climate of your location.
Cedar, known for its beautiful reddish-brown hue and pleasant aroma, is a popular choice due to its relatively low cost and good durability. Redwood, prized for its rich, reddish tones and exceptional resistance to rot and insects, commands a higher price point but offers a longer lifespan. Cypress, another durable option with a slightly lighter color than cedar, boasts excellent resistance to moisture and decay, making it a suitable choice for humid climates.
Shingle Profiles
Wood shingles come in various profiles, influencing their visual appeal and the overall look of your home. Common profiles include beveled, straight, and rustic shingles. Beveled shingles have a tapered edge, creating a layered, shadow-rich appearance that adds depth and texture to the siding. Straight shingles offer a clean, modern look with a uniform profile. Rustic shingles, often hand-split, feature a more irregular and natural appearance, appealing to those seeking a more organic and traditional aesthetic. The choice of profile often depends on the desired style of the home and the overall design scheme.
Durability and Lifespan Comparison
The durability and lifespan of wood shingle siding vary significantly depending on the wood type, shingle profile, and the climate. Redwood, with its natural resistance to decay and insects, generally boasts the longest lifespan, often exceeding 30 years with proper maintenance. Cedar shingles typically last 15-25 years, while cypress can last for a comparable duration. However, factors such as exposure to sunlight, moisture, and regular maintenance practices will significantly influence the longevity of any wood shingle siding. Proper installation and regular cleaning and treatment with wood preservatives are crucial for maximizing the lifespan of your investment.
Wood Shingle Siding Comparison Table
| Wood Type | Cost | Maintenance | Aesthetic Qualities |
|---|---|---|---|
| Cedar | Moderate | Moderate (staining, sealing recommended) | Warm reddish-brown, pleasant aroma |
| Redwood | High | Low (naturally resistant) | Rich reddish tones, durable |
| Cypress | Moderate to High | Low to Moderate (naturally resistant, but periodic maintenance beneficial) | Light to medium brown, durable, resists moisture |
Installation Methods
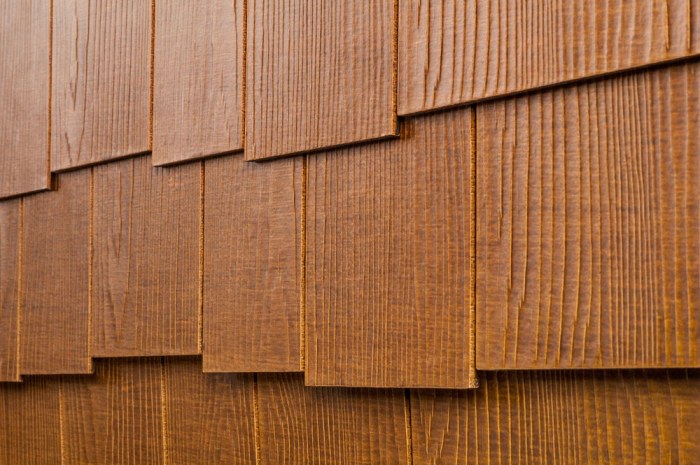
Proper installation of wood shingle siding is crucial for its longevity and aesthetic appeal. A well-installed system will protect your home from the elements for decades, while a poorly installed one can lead to costly repairs and premature failure. This section details the key steps involved in achieving a professional-grade installation.
Wall Preparation
Before installing any siding, thorough wall preparation is paramount. This ensures a solid, level surface for the shingles to adhere to. Neglecting this step can lead to uneven siding, gaps, and ultimately, water damage. The process typically involves several key stages.
- Surface Inspection: A careful inspection of the wall’s surface is necessary to identify any imperfections such as rot, insect damage, or loose sheathing. These areas must be repaired or replaced before proceeding. Imagine a close-up image showing a weathered wood wall with a section of rotted wood clearly visible. The rot is dark and crumbly, contrasting sharply with the surrounding sound wood.
- Sheathing Installation (if needed): If the existing sheathing is damaged or inadequate, new sheathing should be installed. This typically involves using plywood or OSB (Oriented Strand Board) panels, properly fastened to the wall studs. Visualize an image showing a worker securing a sheet of plywood to a wall frame using a nail gun. The plywood is neatly aligned and the nails are evenly spaced.
- Water-Resistive Barrier: A water-resistive barrier (WRB), such as building paper or a house wrap, should be installed over the sheathing. This layer acts as a secondary defense against water intrusion. The image would show a continuous layer of house wrap neatly draped over the wall sheathing, overlapping seams to ensure watertightness.
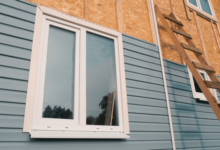
- Flashing: Install flashing around windows and doors before applying the siding. This prevents water from seeping behind the siding and into the building envelope. An image could show correctly installed flashing around a window, with the flashing extending up and over the window frame and tucked under the siding.
- Furring Strips (Optional): Installing furring strips creates an air gap behind the siding, improving ventilation. This is especially important in climates with high humidity. An image depicts furring strips evenly spaced and nailed to the wall, creating a uniform air gap between the wall and the siding.
Nailing Techniques for Different Shingle Profiles
The nailing technique varies depending on the shingle profile. Using the correct method ensures proper shingle overlap and prevents buckling or warping. Incorrect nailing can lead to significant problems down the line.
- Individual Shingles: For individual shingles, nails should be driven near the top edge of the shingle, slightly offset from the center to avoid splitting. The image depicts a worker carefully driving a nail into the upper portion of a wood shingle, leaving a small gap between the nail head and the shingle’s surface.
- Stacked Shingles: Stacked shingles require nails near the top of each course. The nails should be driven at an angle to secure the shingle properly. The picture shows several stacked shingles with nails driven at a slight angle into the overlapping sections.
- Shakes: Shakes, due to their irregular nature, often require more careful nailing to prevent splitting. The nails should be positioned strategically to minimize stress on the wood. The image would showcase a close-up of a hand carefully placing a nail into a rough-hewn shake, avoiding obvious knots or weak points in the wood.
Ventilation Behind Wood Shingle Siding
Adequate ventilation is critical for preventing moisture buildup behind the siding, which can lead to rot, mold, and insect infestation. This is particularly important in humid climates.
Proper ventilation prevents moisture damage and extends the life of your wood shingle siding.
Creating an air gap between the siding and the wall sheathing, often using furring strips, is a crucial aspect of ensuring proper ventilation. This allows air to circulate, carrying away moisture and preventing its accumulation. An image could illustrate the air gap created by furring strips, with arrows indicating the airflow.
Flashing Around Windows and Doors
Flashing is a crucial step in preventing water penetration around openings. It acts as a barrier, diverting water away from vulnerable areas. Proper flashing involves careful attention to detail and correct material selection.
- Window Flashing: Start by installing flashing around the window frame, extending it up and over the top of the frame and tucking it under the siding. The image would clearly show a properly installed window flashing, emphasizing the overlap and sealant used.
- Door Flashing: Similar to window flashing, door flashing should extend beyond the door frame and under the siding. Special attention should be paid to the corners and seams. The image would highlight the proper flashing installation around a door, with attention to the corners and the sealant used.
- Sealant: Use a high-quality sealant to ensure a watertight seal around the flashing and the siding. The image would depict a close-up of the sealant being applied neatly and evenly to ensure a good bond between the flashing and the siding.
Maintenance and Repair
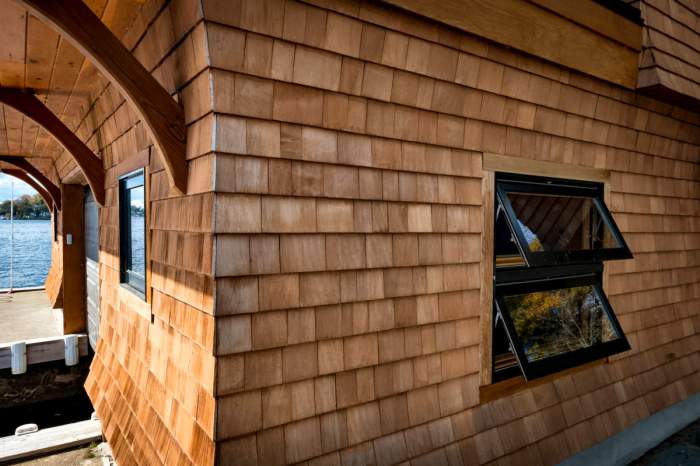
Proper maintenance is crucial for extending the lifespan of your wood shingle siding and preserving its aesthetic appeal. Neglecting routine care can lead to costly repairs and premature deterioration. A proactive approach, however, will safeguard your investment and ensure your home remains beautiful for years to come.
Routine Maintenance Schedule
A regular inspection and maintenance schedule is key to preventing significant problems. This schedule should be adapted to your specific climate and the type of wood used for your siding. For example, areas with high humidity or frequent rainfall will require more frequent attention. Visual inspections should be part of every seasonal change.
Cleaning and Protecting Wood Shingle Siding
Cleaning your wood shingle siding removes dirt, mildew, and algae, which can damage the wood and diminish its appearance. A gentle cleaning with a soft brush and a solution of mild detergent and water is usually sufficient. For more stubborn stains, a pressure washer can be effective, but be careful to avoid damaging the shingles with excessive pressure. After cleaning, applying a high-quality wood preservative or sealant will protect the siding from moisture, UV damage, and insect infestation. Reapplication every few years, depending on the product and climate, is typically recommended.
Common Problems Associated with Wood Shingle Siding
Several issues can affect wood shingle siding over time. Rot is a common problem, often caused by prolonged exposure to moisture. This can lead to structural weakening and unsightly damage. Insect infestations, such as termites or carpenter ants, can also cause significant damage, often unseen until significant structural compromise occurs. Finally, UV degradation from prolonged sun exposure can cause fading, cracking, and splitting of the shingles. Regular inspections are crucial to catch these issues early.
Repair Procedures for Addressing Common Issues
Repairing damaged shingles typically involves replacing the affected areas. For rotted shingles, it’s necessary to carefully remove the damaged shingle and replace it with a new one of the same size and type. Ensure proper fastening to prevent future problems. For insect damage, the affected area might require more extensive repair, possibly including treatment of the underlying structure to prevent further infestation. Replacing damaged shingles requires careful matching of color and texture to maintain a consistent appearance. In some cases, professional help may be needed, especially for extensive damage.
Maintenance Task Schedule
| Task | Frequency | Materials | Notes |
|---|---|---|---|
| Visual Inspection for Damage | Twice Yearly (Spring & Fall) | None | Check for rot, insect damage, loose shingles. |
| Cleaning (Soft Brush & Mild Detergent) | Annually | Soft brush, mild detergent, garden hose | Avoid harsh chemicals or high-pressure washing. |
| Wood Preservative/Sealant Application | Every 2-3 Years | Wood preservative/sealant, paintbrushes/roller | Follow manufacturer’s instructions. |
| Shingle Replacement (as needed) | As needed | Replacement shingles, nails, sealant | Match shingle type and color. May require professional help. |
Aesthetic Considerations
Wood shingle siding offers a wealth of aesthetic possibilities, allowing homeowners to create unique and visually appealing exteriors. The choice of shingle profile, color, and integration with other materials significantly impacts the overall design style and curb appeal. Careful consideration of these elements is crucial for achieving a cohesive and aesthetically pleasing home exterior.
Design Styles and Wood Shingle Siding
Wood shingle siding complements a wide range of architectural styles. Its natural texture and versatility make it suitable for everything from rustic cabins to contemporary homes. For instance, a traditional New England style home might utilize thick, hand-split shingles in a dark, weathered stain to evoke a sense of history and charm. Conversely, a modern farmhouse might employ thinner, more uniform shingles in a lighter, brighter stain, emphasizing clean lines and a minimalist aesthetic. The key is to select shingle profiles and colors that enhance the existing architectural features and create a harmonious look.
Color Options and Staining Techniques
The color palette for wood shingle siding is extensive. Natural wood tones, ranging from light blonde to deep brown, offer a classic and timeless appeal. Staining techniques can further enhance the aesthetic. A solid stain provides a uniform color, while a semi-transparent stain allows the natural wood grain to show through, adding depth and texture. Popular colors include earthy tones like greens, browns, and grays, which blend seamlessly with natural landscapes. Brighter colors, such as blues and reds, can be used for accent walls or to create a more vibrant and playful exterior. The choice of stain should consider the surrounding environment and the desired level of contrast. For example, a home nestled in a wooded area might benefit from earth tones, while a coastal property might look stunning with a lighter, more airy palette.
Visual Impact of Shingle Profiles and Patterns
Different shingle profiles and patterns create distinct visual effects. Thick, hand-split shingles convey a rustic and traditional feel, while thinner, machine-made shingles offer a more refined and modern look. The arrangement of shingles, whether in straight lines, staggered patterns, or more complex designs, also influences the overall appearance. A staggered pattern adds visual interest and texture, while straight lines create a more structured and formal look. The size and shape of the shingles also contribute to the visual impact. Larger shingles create a bolder statement, while smaller shingles provide a more subtle and refined look. The interplay of these elements allows for considerable design flexibility, catering to various tastes and architectural styles.
Sample Exterior Design Integrating Wood Shingle Siding
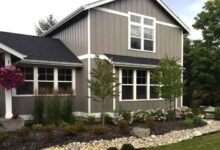
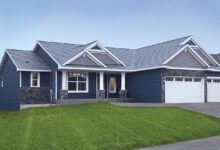
Imagine a two-story craftsman-style home. The exterior features wood shingle siding in a warm, medium brown stain, showcasing a staggered pattern for added texture. The shingles are medium-sized, creating a balanced visual impact. The lower level features a stone foundation, providing a contrasting element and a sense of solidity. Large, multi-paned windows are framed with dark brown trim, complementing the shingle color. A covered porch with exposed wooden beams and a matching brown stain extends from the front of the house, creating a welcoming entrance. The roof is a dark gray asphalt shingle, providing a neutral contrast to the warmer tones of the siding and trim. Landscaping with lush greenery softens the overall look, creating a harmonious blend of natural and man-made elements. This combination of materials and colors creates a warm, inviting, and aesthetically pleasing exterior that seamlessly blends traditional craftsmanship with modern sensibilities.
Cost and Budgeting
Wood shingle siding offers undeniable charm, but its cost can vary significantly. Understanding the factors influencing the price is crucial for accurate budgeting and avoiding unexpected expenses. This section provides a detailed breakdown of costs, influencing factors, potential savings, and a sample budget to guide your planning.
Cost Breakdown of Wood Shingle Siding Installation
The total cost of installing wood shingle siding comprises several key components: material costs, labor costs, and other associated expenses. Material costs depend heavily on the type of wood (e.g., cedar, redwood), grade, and thickness of the shingles. Labor costs are influenced by the project’s size, complexity, and the contractor’s experience and location. Other expenses might include permits, waste removal, and potential repairs to existing siding. A thorough understanding of each component is essential for accurate budgeting.
Factors Influencing Overall Cost
Several factors significantly influence the final cost of your wood shingle siding project. The type of wood chosen directly impacts the price, with premium woods like cedar commanding higher costs than less expensive alternatives. Labor costs vary geographically; regions with higher labor rates will naturally increase the overall project expense. The complexity of the installation – factors such as the home’s size, shape, and the presence of intricate architectural details – will also affect the labor hours required and, therefore, the overall cost. Finally, the condition of the existing siding can add unforeseen expenses if significant repairs are needed before installation can begin.
Cost-Saving Measures
While aiming for cost savings, it’s crucial to maintain quality. One effective strategy is to choose less expensive wood species without sacrificing durability. For example, while cedar is a popular choice, redwood or pine can provide a more budget-friendly option. Another way to save is to plan the project carefully and efficiently, minimizing waste during installation. This requires precise measurements and a well-organized approach. Negotiating with contractors and obtaining multiple bids can also lead to significant savings. Lastly, consider tackling smaller tasks yourself, like preparing the surface, to reduce labor costs, but only if you possess the necessary skills and tools.
Sample Budget
This sample budget illustrates a potential cost breakdown for a medium-sized home (approximately 1,500 square feet of siding). Remember, these figures are estimates and can vary significantly based on the factors discussed above.
| Expense Category | Cost (USD) | Notes |
|---|---|---|
| Materials (Wood Shingles) | $6,000 – $12,000 | Varies greatly depending on wood type, quantity, and grade. |
| Labor | $5,000 – $10,000 | Depends on project complexity, location, and contractor rates. |
| Permits and Inspections | $500 – $1,000 | Local permit fees vary widely. |
| Waste Removal | $200 – $500 | Cost depends on the amount of waste generated. |
| Contingency (Unexpected Expenses) | $1,000 – $2,000 | Always include a buffer for unforeseen issues. |
| Total Estimated Cost | $12,700 – $25,500 | This is a broad range; precise costing requires a detailed quote from a contractor. |
Ultimately, the allure of wood shingle siding lies in its ability to blend natural beauty with lasting durability. By understanding the nuances of wood types, installation methods, and maintenance requirements, you can transform your home’s exterior into a stunning showcase of craftsmanship and style. Remember to factor in the long-term costs, both in terms of materials and maintenance, to ensure a worthwhile investment that enhances your home’s value and curb appeal for years to come. The right wood shingle siding choice isn’t just about aesthetics; it’s about building a lasting legacy for your home.
Top FAQs: Wood Shingle Siding
What is the average lifespan of wood shingle siding?
The lifespan varies greatly depending on the wood type, climate, and maintenance. Cedar and redwood can last 30-50 years or more with proper care, while other woods may have shorter lifespans.
Is wood shingle siding fire-resistant?
Wood shingle siding is naturally combustible. However, treatments are available to improve fire resistance. Check local building codes for fire-retardant requirements.
Can I install wood shingle siding myself?
While DIY is possible, professional installation is often recommended, especially for complex projects. Improper installation can lead to issues with water damage and longevity.
How much does it cost to stain wood shingle siding?
The cost depends on the size of the house, the type of stain used, and whether you hire a professional. Expect to pay several hundred to several thousand dollars.
What are the best ways to prevent insect damage?
Regular inspections, proper ventilation, and the use of insect repellents are key to preventing insect infestation. Consider pre-treating the wood with insecticides.
