Vinyl Siding Trim A Complete Guide
Vinyl siding trim: the unsung hero of curb appeal. Often overlooked, this versatile material significantly impacts a home’s aesthetic and value. From classic J-channels to intricate corner accents, the right vinyl siding trim can transform a house into a home, adding character and enhancing its overall design. This comprehensive guide dives deep into everything you need to know about selecting, installing, and maintaining vinyl siding trim, ensuring your project is a resounding success.
We’ll explore the various types of vinyl siding trim available, detailing their unique applications and aesthetic benefits. Learn the proper installation techniques for a weathertight finish, and discover essential maintenance tips to extend the life of your trim. We’ll also address cost considerations, environmental impacts, and offer stunning color palette suggestions to inspire your next home improvement project. Get ready to elevate your home’s exterior with the power of perfectly chosen vinyl siding trim.
Types of Vinyl Siding Trim
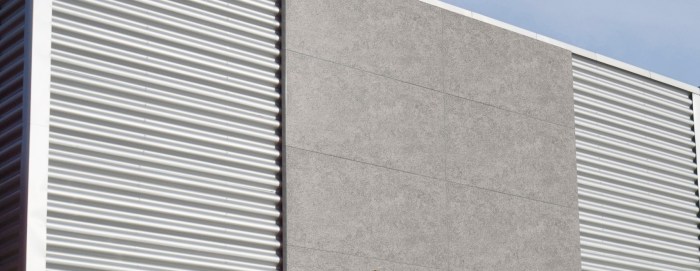
Vinyl siding trim offers a crucial finishing touch, enhancing both the aesthetics and structural integrity of your home’s exterior. Choosing the right trim not only protects your home from the elements but also significantly impacts its overall curb appeal. Understanding the various types available is essential for making informed decisions during your siding project.
Vinyl siding trim comes in a wide array of styles and profiles, each designed for specific applications and aesthetic preferences. The selection process involves considering factors like the style of your home, the desired level of detail, and your budget. Matching trim profiles to your siding creates a cohesive and visually appealing exterior.
Vinyl Siding Trim Profiles and Their Applications
Several key profiles dominate the vinyl siding trim market. Each offers unique functionalities and aesthetic contributions. Proper selection hinges on understanding these differences and how they integrate with your home’s overall design.
| Material | Typical Applications | Cost Considerations | Profile Example |
|---|---|---|---|
| Vinyl (PVC) | Edges of siding, covering seams, creating a clean finish around windows and doors. | Generally affordable, varies based on profile and manufacturer. | J-Channel: A simple, channel-shaped piece used to finish the edges of siding panels, providing a neat and weatherproof seal. |
| Vinyl (PVC) | Exterior corners, providing a clean, mitered look. Often used to protect corner edges from damage. | Moderate cost, depending on size and style. | Corner Trim: Specifically designed to create a sharp, 90-degree corner, eliminating the need for mitering and providing a strong, weather-resistant joint. Variations exist offering different levels of decorative detail. |
| Vinyl (PVC) | Around windows and doors, creating a neat and finished look. Often includes a drip edge to prevent water intrusion. | Cost varies significantly depending on the complexity of the profile and any integrated features. | Window Trim: Available in various profiles, from simple flat pieces to more elaborate designs that complement window styles. Often includes a built-in drip edge to direct water away from the window frame. More ornate styles can significantly impact cost. |
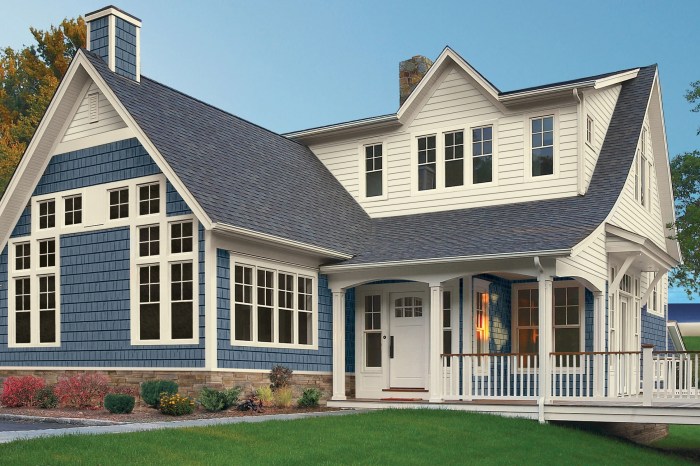
For example, a craftsman-style home might benefit from wider, more ornate window trim and corner pieces, creating a visually rich exterior. Conversely, a modern home might look best with clean lines and minimalist J-channel and simple corner trim. The key is to create a harmonious balance between the siding and the trim.
Installation Methods for Vinyl Siding Trim
Installing vinyl siding trim is a relatively straightforward process, but proper technique is crucial for a long-lasting, weather-resistant finish. This section details the steps involved, emphasizing precision and best practices to achieve professional results. Remember, preparation is key to a successful installation.
Accurate measurements and cuts are paramount to minimize waste and ensure a seamless fit. Improper cutting can lead to gaps, compromising the weather-tight seal and the overall aesthetic appeal. Furthermore, understanding the different types of trim and their respective installation methods will greatly improve the efficiency and quality of your work.
Tools and Materials Required
Before beginning, gather all necessary tools and materials. This will streamline the installation process and prevent interruptions. Having everything readily available ensures a smooth and efficient workflow. A well-organized workspace also contributes to a safer and more productive environment.
- Measuring tape
- Pencil
- Hand saw or miter saw (miter saw recommended for precise angles)
- J-channel
- Level
- Caulk (exterior grade)
- Safety glasses
- Work gloves
- Utility knife
- Vinyl siding trim pieces
Preparing for Installation, Vinyl siding trim
Proper preparation significantly impacts the final result. Ensure the surface is clean, dry, and free from debris. This creates a solid foundation for the trim and prevents adhesion problems. Taking the time to prepare the surface will ultimately save time and effort later on.
- Clean the area where the trim will be installed, removing any dirt, dust, or loose paint.
- Ensure the underlying surface (e.g., sheathing, fascia board) is sound and free from damage.
- Check for any existing water damage and repair as needed before installation.
Measuring and Cutting Vinyl Siding Trim
Precise measurements are essential to avoid costly mistakes and ensure a professional finish. Use a measuring tape and pencil to carefully mark cutting lines. A miter saw is highly recommended for accurate angles, especially for corner pieces. Always measure twice and cut once.
- Measure carefully, taking into account overlaps and desired spacing.
- Mark cutting lines clearly with a pencil.
- Use a miter saw for accurate cuts, especially for angles.
- For hand sawing, use a fine-toothed saw to avoid splintering.
Installing Vinyl Siding Trim
The installation process itself requires attention to detail to ensure a weather-tight seal and a professional appearance. Proper alignment and fastening are key to achieving a successful installation. Start at one end and work your way across, ensuring each piece is securely fastened and aligned.
- Begin installation at a corner or edge, using J-channel as a starting point.
- Snap the trim pieces into place, ensuring proper alignment and overlap.
- Use exterior-grade caulk to seal gaps and joints, preventing water infiltration.
- Check for levelness frequently using a level.
- Fasten trim pieces to the underlying structure using appropriate fasteners (nails or screws), taking care not to overtighten.
Maintenance and Care of Vinyl Siding Trim
Vinyl siding trim, while durable, requires regular maintenance to preserve its attractive appearance and extend its lifespan. Neglecting proper care can lead to premature deterioration, impacting your home’s curb appeal and potentially necessitating costly repairs. Understanding common issues and implementing a simple maintenance schedule will help ensure your vinyl siding trim remains in top condition for years to come.
Common Issues Affecting Vinyl Siding Trim
Several factors can contribute to the degradation of vinyl siding trim. Exposure to the elements, particularly intense sunlight and harsh weather conditions, can cause fading and discoloration. Over time, the UV rays in sunlight can break down the pigments in the vinyl, leading to a noticeable loss of vibrancy. Additionally, impacts from objects, such as branches or sports equipment, can cause cracking or chipping of the trim. Improper installation can also lead to issues, such as gaps that allow moisture to penetrate and cause warping or rotting of the underlying wood. Finally, expansion and contraction due to temperature fluctuations can put stress on the vinyl, potentially leading to cracking in particularly cold climates.
Cleaning and Maintaining Vinyl Siding Trim
Regular cleaning is crucial for maintaining the appearance and longevity of your vinyl siding trim. A simple solution of mild detergent and water, applied with a soft-bristled brush or sponge, is usually sufficient to remove dirt, grime, and mildew. Avoid using abrasive cleaners or harsh chemicals, as these can scratch or damage the vinyl surface. For stubborn stains, a solution of bleach and water (following manufacturer’s dilution recommendations) can be effective, but always test it on an inconspicuous area first. Rinse thoroughly with clean water after cleaning and allow the trim to air dry completely. Consider pressure washing as a more powerful cleaning method, but use low pressure to avoid damaging the vinyl. Always maintain a safe distance from the siding to prevent damage.
Repairing Minor Damage to Vinyl Siding Trim
Minor damage, such as small cracks or chips, can often be repaired with readily available vinyl repair kits. These kits typically contain vinyl caulk or patching compound designed to match the color of your siding. Carefully clean the damaged area before applying the repair material, ensuring a smooth, even application. Allow the repair to dry completely according to the manufacturer’s instructions. For more significant damage, replacement of the affected trim section might be necessary. This often involves removing the damaged piece and installing a new one, ensuring proper alignment and sealing to prevent moisture penetration.
Vinyl Siding Trim Maintenance Schedule
A regular maintenance schedule helps prevent minor issues from escalating into costly repairs. Here’s a sample schedule:
| Task | Frequency |
|---|---|
| Visual inspection for damage | Annually (Spring) |
| Cleaning with mild detergent and water | Twice yearly (Spring and Fall) |
| Repair minor damage (if needed) | As needed |
| Pressure washing (if needed) | Every 2-3 years |
Vinyl Siding Trim and Home Aesthetics
Vinyl siding trim offers a surprisingly impactful way to elevate a home’s curb appeal. Beyond its protective function, strategically chosen trim can dramatically alter the perceived style and value of a property, transforming a simple house into a stunning home. The right trim can create visual interest, highlight architectural details, and even subtly correct perceived flaws in the overall design.
The impact of vinyl siding trim on home aesthetics is multifaceted. It allows homeowners to personalize their homes, adding character and enhancing the visual appeal. Careful selection of color, style, and placement can create a cohesive and attractive exterior, boosting property value and creating a positive first impression. The versatility of vinyl siding trim makes it adaptable to a wide range of architectural styles and personal preferences, allowing for unique and expressive design choices.
Vinyl Siding Trim in Different Architectural Styles
The application of vinyl siding trim varies significantly depending on the architectural style of the home. Victorian homes, known for their intricate details and ornate features, benefit from wider, more elaborate trim pieces that echo the complexity of the overall design. Think of substantial crown molding, decorative brackets, and richly detailed window casings. In contrast, Ranch style homes, which often emphasize clean lines and a horizontal emphasis, might utilize simpler, narrower trim profiles to maintain the style’s inherent simplicity. Colonial homes, with their classic symmetry and balanced proportions, can be beautifully accented with crisp, evenly spaced trim, often featuring pilasters and pediments to further emphasize the architectural harmony.
Color Schemes and Trim Combinations
Choosing the right color combination for your siding and trim is crucial for achieving a visually appealing result. The contrast between siding and trim can significantly impact the overall aesthetic. A subtle contrast can create a refined and elegant look, while a bolder contrast can make a stronger statement. The choice depends on the desired effect and the architectural style of the home.
“For a classic and timeless look, consider pairing a light gray or beige siding with crisp white trim. This creates a clean, sophisticated aesthetic that complements a variety of architectural styles.”
“To achieve a more modern and contemporary feel, explore pairings of dark gray or charcoal siding with black or dark bronze trim. This high-contrast combination creates a dramatic and stylish effect.”
“For a warm and inviting atmosphere, try combining a warm brown or taupe siding with a complementary lighter brown or beige trim. This color scheme works particularly well with traditional or craftsman-style homes, creating a cozy and inviting curb appeal.”
Cost Considerations of Vinyl Siding Trim
The cost of vinyl siding trim is influenced by several interconnected factors, making it crucial to understand these variables before embarking on a home improvement project. Accurate budgeting requires a comprehensive assessment of material choices, labor costs, and the complexity of the installation. Failing to account for these elements can lead to significant cost overruns.
Several key factors significantly impact the overall expense. Material costs vary based on the type of vinyl siding trim selected, its quality, and the amount needed. Labor costs depend on the installer’s experience, location, and the project’s scope. Finally, installation complexity—determined by factors like the home’s design, existing siding, and the extent of necessary repairs—plays a crucial role in determining the final price.
Vinyl Siding Trim Material Costs
The price of vinyl siding trim fluctuates depending on the profile, thickness, and manufacturer. Higher-quality vinyl, often featuring enhanced durability and UV resistance, commands a higher price per linear foot. Elaborate designs and textures also increase the cost. For example, a simple J-channel might cost significantly less than a more complex board-and-batten trim. Furthermore, purchasing in bulk often results in cost savings per unit.
Labor Costs for Vinyl Siding Trim Installation
Labor costs constitute a substantial portion of the overall project expense. Experienced installers command higher hourly rates due to their expertise and efficiency. The project’s size and complexity directly influence labor costs; a larger house with intricate architectural details will naturally require more labor hours. Geographic location also impacts labor rates, with higher costs prevalent in areas with a higher cost of living and greater demand for skilled labor. Finally, the seasonality of the work can influence pricing, with higher demand during peak construction seasons resulting in potentially higher labor rates.
Installation Complexity and its Impact on Cost
The complexity of the installation significantly impacts the overall cost. Homes with intricate designs, multiple angles, or extensive repairs to existing siding will necessitate more time and expertise, thus increasing the labor costs. Difficult-to-access areas, such as high gables or narrow sections, add to the complexity and the overall project timeline. Pre-existing conditions, like rotted wood trim requiring extensive repair or removal before installation, also increase the overall cost.
Cost Comparison: Vinyl Siding Trim vs. Alternatives
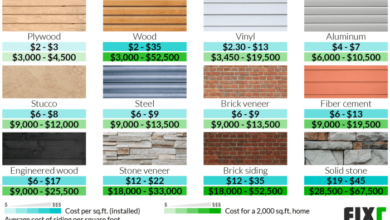
Vinyl siding trim offers a cost-effective alternative to traditional materials like wood and aluminum. Wood trim, while aesthetically pleasing, requires regular maintenance, painting, and is susceptible to rot and insect damage, leading to higher long-term costs. Aluminum trim, while durable, is typically more expensive upfront than vinyl and may not offer the same aesthetic versatility. A direct cost comparison is difficult without specifying the specific products and labor rates, but generally, vinyl represents a lower initial investment with potentially lower long-term maintenance expenses.
Typical Costs for Vinyl Siding Trim Installation
Estimating the cost of vinyl siding trim installation for a standard-sized home requires considering several factors. For a single-story, average-sized home (approximately 1,500-2,000 square feet), a reasonable estimate for materials and labor might range from $2,000 to $5,000, depending on the factors discussed above. However, this is a broad estimate and can vary widely. More complex homes or those requiring significant repairs could easily exceed this range.
Price Comparison of Vinyl Siding Trim Options
| Vinyl Siding Trim Type | Price per Linear Foot (USD) |
|---|---|
| Standard J-Channel | $0.50 – $1.50 |
| Board and Batten | $1.00 – $3.00 |
| Corner Trim | $1.50 – $4.00 |
Note: Prices are approximate and can vary based on supplier, quantity purchased, and regional factors.
Environmental Impact of Vinyl Siding Trim
Vinyl siding trim, while offering durability and low maintenance, presents environmental considerations throughout its lifecycle. From the extraction of raw materials to manufacturing, installation, and eventual disposal, its impact on the planet warrants careful examination. Understanding this impact allows for informed choices and the adoption of more sustainable practices.
The environmental impact of vinyl siding trim is primarily linked to its composition: polyvinyl chloride (PVC). PVC production is energy-intensive and relies on the use of fossil fuels, contributing to greenhouse gas emissions. Furthermore, the manufacturing process can release harmful byproducts, including dioxins, a persistent organic pollutant with significant health and environmental consequences. The longevity of vinyl siding, while a benefit in terms of reduced replacement frequency, means a longer period of potential environmental impact from its embedded carbon and any leaching of chemicals. Disposal poses further challenges, as PVC is not easily biodegradable and often ends up in landfills, contributing to environmental pollution.
Manufacturing and Disposal of Vinyl Siding Trim
Manufacturing vinyl siding trim involves several stages, each with its own environmental footprint. The extraction and processing of raw materials, primarily crude oil and chlorine, consume significant energy and release greenhouse gases. The polymerization process to create PVC, the subsequent manufacturing of siding, and transportation all add to the carbon footprint. Disposal is another significant concern. While some vinyl siding can be recycled, the process is often complex and not widely available. Much of it ends up in landfills, where it persists for hundreds of years, contributing to landfill volume and potentially leaching harmful chemicals into the surrounding environment. The lack of widespread recycling infrastructure for vinyl siding exacerbates this issue.
Comparison with Alternative Materials
Compared to alternative materials like wood, the environmental impact of vinyl siding is a complex issue with no simple answer. Wood trim, while renewable, often requires significant processing, transportation, and potentially the use of chemical treatments for pest and rot protection. Deforestation is also a concern for wood sourced from unsustainable practices. However, wood is biodegradable, making its end-of-life impact less severe than that of vinyl siding. Fiber cement siding, another alternative, boasts a lower carbon footprint than vinyl but requires more energy-intensive manufacturing. Ultimately, the “greenest” option depends on a range of factors including the sourcing of materials, manufacturing processes, transportation distances, and end-of-life management.
Minimizing Environmental Impact
Several strategies can mitigate the environmental impact of vinyl siding trim. Choosing recycled content vinyl siding reduces the demand for virgin materials. Supporting manufacturers committed to sustainable practices, including those implementing energy-efficient production methods and waste reduction strategies, is crucial. Responsible disposal through recycling programs, when available, significantly reduces landfill burden. Careful consideration of material selection, taking into account the entire lifecycle from sourcing to disposal, allows homeowners and builders to make more informed and environmentally responsible decisions.
Lifecycle Environmental Impact Comparison: Vinyl vs. Wood Trim
The following bulleted list compares the lifecycle environmental impact of vinyl siding trim and wood trim:
- Manufacturing: Vinyl siding generally requires more energy and releases more greenhouse gases during manufacturing than wood trim, particularly if the wood is sourced sustainably and locally.
- Transportation: Transportation impacts depend on sourcing and distance, but vinyl siding often involves longer transportation distances due to centralized manufacturing facilities, potentially increasing its carbon footprint.
- Maintenance: Vinyl siding requires minimal maintenance, reducing the need for energy-intensive processes associated with repainting or treating wood trim.
- Longevity: Vinyl siding typically lasts longer than wood, reducing the frequency of replacement and associated environmental impacts.
- Disposal: Vinyl siding is not readily biodegradable and often ends up in landfills, whereas wood trim can decompose naturally or be composted.
- Recyclability: Recycling infrastructure for vinyl siding is limited compared to the potential for wood reuse or recycling.
Visual Representation of Vinyl Siding Trim
Vinyl siding trim significantly impacts a home’s overall aesthetic appeal. Understanding its visual characteristics—texture, color, and the interplay of light and shadow—is crucial for achieving the desired look. This section delves into the visual aspects of various vinyl siding trim profiles, providing a detailed understanding of their impact on home design.
The texture and appearance of vinyl siding trim vary considerably depending on the chosen profile. Some profiles mimic the look of wood, offering a deeply embossed texture with realistic grain patterns. Others feature a smoother, more contemporary finish. The degree of embossing directly affects the perceived depth and visual interest. A heavily embossed profile will cast more shadows, adding a three-dimensional quality, while a smooth profile presents a cleaner, more minimalist appearance.
Vinyl Siding Trim Profiles and Textures
The variety of profiles available allows for diverse design choices. For instance, a “colonial” profile often features a wider, more substantial appearance, suggesting strength and traditional elegance. Conversely, a “board and batten” profile, with its vertical lines, provides a more modern and streamlined look. These differences in profile width, shape, and embossing create distinct visual impressions.
Color and Finish Options in Vinyl Siding Trim
Vinyl siding trim offers a vast array of colors and finishes to complement any architectural style. From classic white and earth tones to bolder hues like deep reds and blues, the options are extensive. Finishes range from matte to high-gloss, each impacting how light reflects off the surface. A matte finish tends to absorb light, creating a softer, more subtle appearance, while a high-gloss finish reflects light, producing a brighter, more vibrant effect.
Light and Shadow Interaction with Vinyl Siding Trim
The interaction of light and shadow is a key factor in how vinyl siding trim is perceived visually. The depth of embossing directly influences shadow formation. Deeply embossed profiles cast pronounced shadows, enhancing their three-dimensional appearance and adding visual depth to the home’s exterior. Smooth profiles, on the other hand, exhibit less shadow play, resulting in a cleaner, flatter appearance. The angle of the sun and the time of day will also impact how shadows are cast, altering the overall visual effect throughout the day. For example, a heavily embossed trim might appear more dramatic in the late afternoon sun, while a smooth trim will maintain a consistent appearance regardless of the lighting conditions.
Mastering the art of vinyl siding trim installation isn’t just about aesthetics; it’s about protecting your investment and boosting your home’s value. By understanding the different types of trim, mastering proper installation techniques, and implementing a consistent maintenance schedule, you can ensure your home enjoys lasting beauty and protection from the elements. Remember, the details matter, and with the right knowledge and attention to detail, your vinyl siding trim can be the crowning glory of your home’s exterior.
FAQ
Can I paint vinyl siding trim?
While vinyl siding is designed to be low-maintenance and doesn’t typically require painting, special paints formulated for vinyl are available if you desire a color change. However, proper preparation is crucial for adhesion and longevity.
How often should I clean my vinyl siding trim?
A yearly cleaning with soap and water is generally sufficient. More frequent cleaning may be needed in areas with heavy pollution or tree cover.
What should I do if I notice a crack in my vinyl siding trim?
Small cracks can often be repaired with vinyl caulk. Larger cracks may require replacing the damaged section of trim.
Does vinyl siding trim attract insects?
Vinyl siding itself is generally resistant to insect infestation, unlike wood trim which can attract termites or other wood-boring insects. However, proper installation and sealing are important to prevent pests from nesting behind the trim.
How long does vinyl siding trim typically last?
With proper installation and maintenance, vinyl siding trim can last for 20-30 years or even longer.
