Hardie Panel Installation A Complete Guide
Hardie panel installation, a process often perceived as daunting, is actually quite manageable with the right knowledge and approach. This comprehensive guide delves into every aspect of installing Hardie panel siding, from initial planning and material selection to the intricacies of panel attachment and finishing touches. We’ll cover essential tools, safety precautions, troubleshooting common issues, and even showcase inspiring installation examples. Whether you’re a seasoned professional or a DIY enthusiast, this guide provides the step-by-step instructions and expert insights you need to achieve a stunning and long-lasting result.
We’ll explore the various types of Hardie panels, their suitability for different projects, and the advantages they offer over traditional siding materials. We’ll then walk you through the entire installation process, from preparing the wall surface and cutting panels to the final touches of caulking and painting. Along the way, we’ll address common challenges and offer practical solutions to ensure a smooth and successful installation every time. Get ready to transform your home’s exterior with the beauty and durability of Hardie panel siding.
Introduction to Hardie Panel Installation
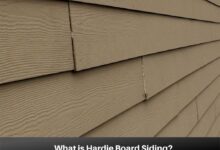
Hardie panel siding, manufactured by James Hardie, represents a popular choice for exterior cladding due to its durability, aesthetic appeal, and low-maintenance characteristics. It’s a fiber cement product, offering a robust alternative to traditional wood siding and vinyl alternatives. This guide provides an overview of Hardie panel installation, covering various aspects from material selection to project considerations.
Hardie panel siding boasts several advantages over other materials. Unlike wood, it’s highly resistant to rot, insect infestation, and fire damage, significantly reducing long-term maintenance and replacement costs. Compared to vinyl, Hardie siding offers a more realistic wood-like appearance and superior durability, withstanding extreme weather conditions better. Its longevity translates to a higher return on investment over its lifespan.
Hardie Panel Types and Applications
Several types of Hardie panels cater to diverse architectural styles and project needs. The primary distinctions lie in the panel’s texture, thickness, and profile. For instance, HardiePlank® lap siding mimics the look of traditional wood lap siding, offering a classic and versatile option for a wide range of homes. HardieShingle® siding, with its staggered shingle profile, provides a more textured and rustic appearance, often used to achieve a charming, traditional aesthetic. HardiePanel® vertical siding offers a clean, modern look, popular in contemporary architectural designs. The choice of panel type depends largely on the desired aesthetic and the specific requirements of the project. Thicker panels generally offer increased durability and impact resistance.
Benefits of Using Hardie Panel Siding
The inherent properties of fiber cement contribute significantly to the numerous advantages of Hardie panel siding. Its fire resistance surpasses that of wood siding, offering a critical safety benefit. The material’s resistance to moisture and pests eliminates the need for frequent treatments and repairs often associated with wood siding. Furthermore, Hardie panels are engineered for longevity, requiring minimal maintenance and significantly extending the lifespan of the exterior cladding compared to other materials. The long-term cost savings resulting from reduced maintenance and repairs make Hardie siding a financially sound investment.
Installation Considerations for Hardie Panel Siding
Proper installation is paramount to ensuring the longevity and performance of Hardie panel siding. This involves careful planning, precise measurements, and adherence to the manufacturer’s guidelines. Factors such as climate conditions, building codes, and the specific type of Hardie panel selected all influence the installation process. A professional installation guarantees a high-quality finish and prevents potential issues down the line. Utilizing appropriate tools and techniques, such as proper nailing patterns and the use of flashing, is essential to prevent water damage and maintain the structural integrity of the siding. Careful attention to detail during installation is crucial for achieving a durable and aesthetically pleasing result.
Tools and Materials Required for Installation
Installing Hardie panel siding requires a specific set of tools and materials to ensure a professional, long-lasting finish. Proper preparation and the right equipment are key to a successful installation, minimizing frustration and maximizing efficiency. Failing to have the necessary tools on hand can significantly delay the project and potentially compromise the quality of the final product.
Essential Tools for Hardie Panel Installation
Choosing the right tools is paramount for efficient and safe Hardie panel installation. The following table categorizes the necessary tools for various stages of the process.
| Cutting & Measuring | Fastening & Securing | Finishing & Safety | Other Essential Tools |
|---|---|---|---|
| Measuring Tape | Hammer | Safety Glasses | Level |
| Pencil | Nail Gun (recommended) | Work Gloves | Chalk Line |
| Circular Saw (with fine-tooth blade for Hardie board) | Drill with appropriate bits | Hearing Protection | Caulk Gun |
| Jigsaw (for intricate cuts) | Screwdriver (for fasteners) | Dust Mask | Putty Knife |
| Speed Square | Impact Driver (recommended) | Safety Harness (for elevated work) | Utility Knife |
Hardie Panel Types and Recommended Fasteners
Selecting the correct fasteners is critical for a secure and durable installation. Using the wrong fasteners can lead to panel failure, compromising the structural integrity and longevity of the siding. The table below Artikels the recommended fasteners for different Hardie panel types.
| Hardie Panel Type | Recommended Fastener Type | Important Considerations |
|---|---|---|
| Lap Siding | Galvanized nails or screws | Proper nail spacing and penetration depth are crucial to prevent cracking. |
| Shiplap Siding | Galvanized nails or screws | Ensure fasteners are driven straight to avoid damage to the panel. |
| Panel Siding (e.g., RanchBoard) | Galvanized screws | Screws provide superior holding power compared to nails, especially in larger panels. |
| Soffit and Trim Boards | Galvanized nails or screws | Choose fasteners appropriate for the thickness and application of the board. |
Importance of Safety Equipment
Working with Hardie panels and power tools presents several potential hazards. Appropriate safety equipment is not optional; it’s essential to prevent injuries and ensure a safe working environment. Ignoring safety precautions can lead to serious consequences, including eye injuries, hearing damage, respiratory problems, and falls from heights.
Always prioritize safety. The cost of an injury far outweighs the cost of safety equipment.
Preparation and Planning
Proper preparation and meticulous planning are crucial for a successful Hardie panel installation. Failing to adequately prepare the wall surface or accurately measure and cut the panels can lead to significant issues down the line, including wasted materials, unsightly gaps, and even structural problems. This section details the steps to ensure a smooth and efficient installation process.
Wall Surface Preparation
Before installing Hardie panels, the wall surface must be thoroughly cleaned and prepared. This involves removing any loose debris, dirt, dust, old paint, or other materials that could compromise the bond between the panels and the wall. A wire brush or scraper can be used to remove loose paint or flaking material. For stubborn residue, a pressure washer might be necessary, but ensure you avoid excessive water penetration that could damage underlying structures. After cleaning, allow the surface to completely dry. Any cracks or gaps in the wall should be filled with an appropriate patching compound, ensuring a smooth, even surface. Once the patching compound is dry, sand the surface smooth to create a level plane for panel installation. Priming the surface is highly recommended, particularly on porous substrates like wood or concrete, to improve adhesion and prevent moisture absorption. Allow the primer to dry completely before proceeding to the next stage.
Measuring and Cutting Hardie Panels
Accurate measurements are paramount to minimizing waste and ensuring a professional-looking finish. Begin by carefully measuring the wall sections where Hardie panels will be installed. Account for any windows, doors, or other obstructions. Use a measuring tape and marking pencil to create precise markings on the panels. Always measure twice and cut once. For cutting Hardie panels, a circular saw with a fine-toothed blade designed for cutting fiber cement is recommended. A scoring tool can be used for straighter cuts on smaller panels. Wear appropriate safety gear, including eye protection, hearing protection, and a dust mask, as cutting Hardie panels generates significant dust. When cutting, support the panel securely to prevent it from shifting or bending during the cutting process. After cutting, use sandpaper to smooth any rough edges to prevent injury during handling and to ensure a neat, finished appearance.
Panel Layout Planning
Efficient panel layout planning minimizes material waste and enhances the aesthetic appeal of the finished project. Start by sketching a diagram of the wall, noting the location of windows, doors, and other features. Plan the placement of panels to maximize the use of full-size panels and minimize the need for cuts. Consider the direction of the wood grain (if visible) to ensure a visually consistent appearance. For large areas, begin by installing full-size panels wherever possible. Then, use the remaining space to plan for the smaller cut pieces, ensuring that the cuts are strategically placed to create a balanced and aesthetically pleasing design. This process will significantly reduce material waste and produce a more professional-looking installation. Always double-check your measurements and layout before committing to any cuts. A well-planned layout will save time and materials, resulting in a more efficient and cost-effective installation.
Installation Process
Proper sheathing and flashing are critical for preventing moisture intrusion and ensuring the longevity of your Hardie panel siding. Neglecting these steps can lead to costly repairs down the line, including rot, mold, and structural damage. This section details the best practices for installing these crucial components.
Sheathing Installation
Proper sheathing installation provides a stable and weather-resistant base for your Hardie panels. The sheathing material, typically plywood or OSB, should be installed according to the manufacturer’s specifications, ensuring proper overlap and fastening. Fasteners should be driven straight to avoid splitting the sheathing. All seams and edges should be sealed with a high-quality sealant to prevent water penetration. The sheathing should be perfectly flat to ensure even Hardie panel installation. Uneven sheathing can lead to panel gaps and potential moisture issues. Consider using a moisture meter to check the dryness of the sheathing before installing the panels to avoid potential issues with expansion and contraction.
Flashing Installation
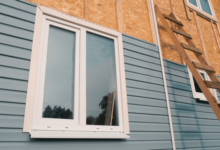
Flashing acts as a barrier against water penetration at critical areas like windows, doors, and corners. Proper flashing installation is crucial to prevent water from seeping behind the Hardie panels. Flashing should extend beyond the edges of the openings and be installed before the Hardie panels are affixed. Use flashing that is compatible with Hardie panels and the local climate. Overlapping flashing layers should be sealed to prevent water leakage. Common flashing materials include aluminum and galvanized steel. Always ensure a proper seal between the flashing and the sheathing to prevent water intrusion. Consider using self-adhesive flashing tape for added protection.
Starter Strip Installation
Starter strips provide a straight, even base for the first row of Hardie panels. They are typically installed horizontally at the bottom of the wall. Properly installed starter strips ensure that the first row of panels is perfectly aligned, creating a professional-looking finish. Nail the starter strip securely to the sheathing, ensuring that the nails are driven straight and properly spaced. The starter strip should be flush with the sheathing, creating a solid foundation for the first course of panels. Consider using a level to ensure that the starter strip is perfectly horizontal. Using a chalk line can assist in achieving a straight line before installation.
J-Channel Installation
J-channels are used at corners and around windows and doors to create a neat and weathertight finish. They provide a channel for the panels to fit into, creating a clean, professional look. J-channels should be installed before the panels are affixed. Ensure the J-channels are properly aligned and secured to the sheathing using appropriate fasteners. Use a level to ensure the channels are plumb and straight. Properly securing the J-channel is essential to prevent water damage. A properly installed J-channel will ensure a clean, professional look and protect against moisture damage.
Securing Hardie Panels
Hardie panels are typically secured using nails or screws. The manufacturer’s specifications should be followed meticulously regarding fastener type, size, and spacing. Over-driving fasteners can damage the panels, while under-driving can lead to loose panels and potential damage. Use corrosion-resistant fasteners to prevent rust and damage to the panels. Pre-drilling pilot holes can help prevent splitting, particularly with thicker panels. Fasteners should be driven straight and flush with the panel surface. Always ensure the correct spacing between fasteners, to allow for expansion and contraction of the panels due to temperature changes. Using a nail gun can speed up the installation process, but requires precision to avoid damaging the panels.
Installation Process: Panel Attachment and Finishing
This section details the crucial steps involved in securely attaching Hardie panels to your wall and achieving a professional, long-lasting finish. Proper nailing, cutting techniques, and meticulous finishing are paramount to ensuring the longevity and aesthetic appeal of your siding project. Paying close attention to detail in these final stages will significantly impact the overall quality of your installation.
Panel Attachment
Securely attaching Hardie panels requires precision and adherence to manufacturer guidelines. Improper nailing can lead to cracking, warping, and ultimately, premature failure of the siding. The following steps Artikel best practices for panel attachment.
- Pre-drilling Pilot Holes: Before nailing, pre-drill pilot holes slightly smaller than the diameter of your nails. This prevents splitting, especially in harder wood framing. Use a drill bit sized approximately 1/16″ smaller than your nail diameter.
- Nail Placement and Spacing: Use galvanized nails specifically designed for fiber cement siding. Nails should be driven straight into the framing, avoiding angles. Maintain consistent spacing, typically 6 inches apart along the edges and 12 inches apart in the field. Refer to your specific Hardie panel product’s installation guide for precise spacing recommendations.
- Nail Depth: Drive nails to the recommended depth, typically 1/8″ to 1/4″ from the panel surface. Over-driving can cause cracking, while under-driving can compromise the hold. A nail gun with a depth adjustment feature is highly recommended for consistency.
- Staggering Nail Placement: Stagger nail placement between adjacent panels to distribute stress evenly and prevent warping. Avoid driving nails too close together.
- Counter-sinking: Slightly countersink the nail heads to allow for proper caulking and painting. This creates a smooth surface, preventing nail heads from catching on clothing or causing paint imperfections.
Cutting and Installing Panels Around Openings
Precise cutting and installation around windows and doors are essential for a clean, professional look. Using the correct tools and techniques will minimize material waste and ensure a seamless fit.
- Accurate Measurements: Precise measurements are critical. Carefully measure the opening, taking into account any trim or flashing requirements. Double-check measurements to avoid costly mistakes.
- Cutting Techniques: Use a circular saw with a fine-tooth blade specifically designed for cutting fiber cement. Wear appropriate safety gear, including eye protection and a dust mask. Score the panel first to help guide the saw for cleaner cuts.
- Jigsaw for Intricate Cuts: For more intricate cuts, a jigsaw can be more maneuverable. Use a blade designed for fiber cement. A sharp blade will ensure a cleaner, more accurate cut.
- Fitting and Securing: Once cut, carefully fit the panels around the opening. Use shims to ensure proper alignment and spacing. Secure the panels with nails following the previously mentioned guidelines.
Finishing
The final stage of Hardie panel installation involves caulking, sealing, and painting, all crucial steps to protect the siding and enhance its aesthetic appeal.
- Caulking: Apply high-quality exterior-grade caulk to all seams, joints, and gaps between panels, around windows and doors, and where the siding meets other building materials. This prevents water penetration and ensures a weathertight seal. Choose a paintable caulk that matches your siding color.
- Sealing: Consider using a sealant specifically designed for fiber cement siding to further enhance protection against moisture. Apply according to manufacturer instructions.
- Painting: Apply a high-quality exterior-grade paint designed for fiber cement siding. Follow the manufacturer’s instructions for application and drying time. Two coats are typically recommended for optimal protection and color coverage. Prime the panels first if the manufacturer recommends it.
Troubleshooting Common Installation Issues
Even with careful planning and execution, Hardie panel installation can present challenges. Understanding common problems and their solutions is crucial for a successful and long-lasting installation. This section details troubleshooting strategies to address issues that may arise during the process, ensuring a professional-looking and durable final product. Proactive problem-solving minimizes costly repairs and ensures client satisfaction.
Addressing problems promptly is key to preventing minor issues from escalating into major headaches. Early detection and swift action save time and money in the long run. Remember, a well-maintained installation reflects positively on your professionalism.
Panel Warping
Panel warping, a common issue, often stems from improper storage or exposure to extreme temperature fluctuations before, during, or after installation. Warped panels compromise the aesthetic appeal and structural integrity of the siding.
Prevention is paramount. Store panels flat, in a dry, climate-controlled environment. Avoid direct sunlight exposure. During installation, ensure proper fastening and spacing to allow for expansion and contraction. If warping occurs, gently attempt to reshape the panel using a heat gun (applying heat evenly and cautiously) and then immediately securing it to the framing. Severe warping may necessitate panel replacement.
Panel Cracking
Cracks in Hardie panels can result from forceful impacts, improper handling, or insufficient support during installation. These cracks compromise the panel’s weather resistance and aesthetic quality.
Careful handling throughout the installation process is crucial. Avoid dropping or impacting the panels. Ensure adequate support during installation, preventing stress points. Minor cracks might be repaired with a suitable filler and paint matched to the panel’s color. Larger cracks typically require panel replacement.
Fastener Failure
Using inappropriate fasteners or improper installation techniques can lead to fastener failure, causing panels to loosen or detach. This compromises the structural integrity of the siding and exposes the underlying structure to the elements.
Always use the manufacturer’s recommended fasteners and follow their installation guidelines precisely. Ensure fasteners are driven straight and to the correct depth, avoiding over-tightening. Regularly inspect the installation for loose fasteners and promptly replace any that fail. Periodically checking fasteners, especially after extreme weather events, is a proactive maintenance step.
Repairing Damaged Panels
Minor damage to Hardie panels, such as small scratches or dents, can often be repaired using specialized fillers and paints. Always use products specifically designed for fiber cement materials.
Follow the manufacturer’s instructions for the filler and paint application. Ensure proper surface preparation, including cleaning and sanding, before applying the filler. After the filler has dried, carefully sand the area smooth and apply several coats of paint to achieve a seamless finish. For significant damage, replacement is the recommended solution. This ensures the long-term durability and aesthetic quality of the installation.
Advanced Techniques and Considerations
Installing Hardie panels can present unique challenges beyond standard wall applications. This section delves into advanced techniques for tackling complex projects and ensuring a professional finish. Mastering these skills will elevate your Hardie panel installation capabilities and allow you to take on more intricate projects.
Successfully installing Hardie panels on complex surfaces requires careful planning and precise execution. Adapting standard techniques to accommodate curves, angles, and irregular shapes demands a higher level of skill and attention to detail. Proper material selection and meticulous cutting are critical for achieving a seamless, aesthetically pleasing result. Integrating other building materials requires a solid understanding of compatibility and proper fastening techniques to ensure structural integrity and prevent future issues.
Hardie Panel Installation on Complex Surfaces
Installing Hardie panels on curved walls or irregular surfaces necessitates a more flexible approach than flat-surface installations. Pre-bending the panels to a slight degree is often possible, depending on the material and the degree of curvature. However, for significant curves, you might need to employ a segmented approach, cutting the panels into smaller, more manageable pieces that can be fitted to the surface. This requires meticulous measuring and precise cuts to ensure a smooth, continuous transition between each segment. Consider using flexible adhesive in addition to fasteners for enhanced adhesion and to help compensate for any minor gaps. For extremely complex curves, custom fabrication of the panels might be necessary. A skilled fabricator can create panels precisely tailored to the shape of the wall, ensuring a perfect fit.
Integrating Other Building Materials with Hardie Panels
Seamless integration of Hardie panels with other building materials, such as trim and molding, is crucial for achieving a professional and visually appealing finish. Proper preparation is key. Ensure all surfaces are clean, level, and properly primed before installation. When using trim, it’s essential to select compatible materials that won’t react negatively with the Hardie panel. For example, ensure the wood trim is properly treated for exterior use and primed to prevent moisture damage. Fastening techniques should be appropriate for both materials; using the correct nails or screws to prevent damage and ensure a secure bond. Caulk should be applied to seal any gaps between the Hardie panels and the trim, providing a weather-resistant seal. Properly integrating these elements will create a cohesive and professional-looking exterior.
Construction Waste Disposal, Hardie panel installation
Responsible disposal of construction waste is crucial for environmental sustainability and compliance with local regulations. Hardie panels, while durable, should be handled and disposed of properly. Separate different types of waste (wood scraps, packaging, etc.) for easier recycling or disposal. Many municipalities have specific guidelines for construction debris; research your local regulations to understand requirements for disposal or recycling of materials. Consider renting a dumpster for larger projects to manage waste efficiently and minimize environmental impact. Always follow the manufacturer’s recommendations for safe handling and disposal of any leftover materials or damaged panels. Proper disposal helps to minimize environmental impact and ensures compliance with local regulations.
Illustrative Examples of Hardie Panel Installations
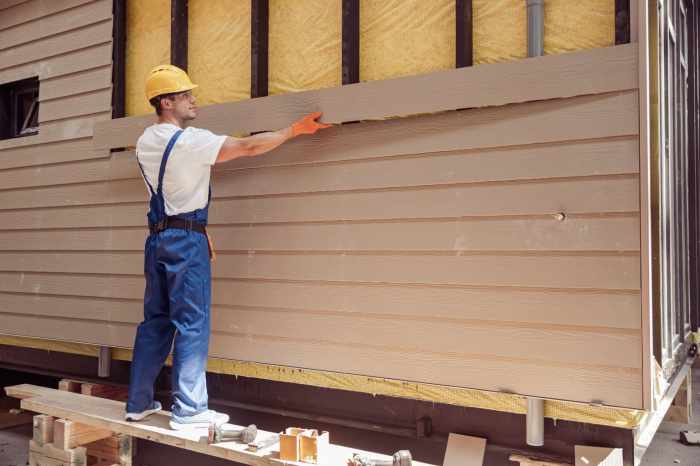
This section showcases three diverse Hardie panel installations, highlighting the versatility of the material and the range of design possibilities it offers. Each example demonstrates different approaches to panel orientation, color selection, and overall aesthetic impact, illustrating how Hardie panel siding can be adapted to various architectural styles and homeowner preferences. These examples are not exhaustive, but they provide a solid foundation for understanding the creative potential of Hardie panel installations.
Example 1: Modern Farmhouse with Vertical Panel Orientation
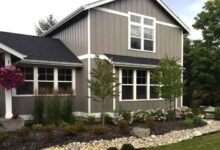
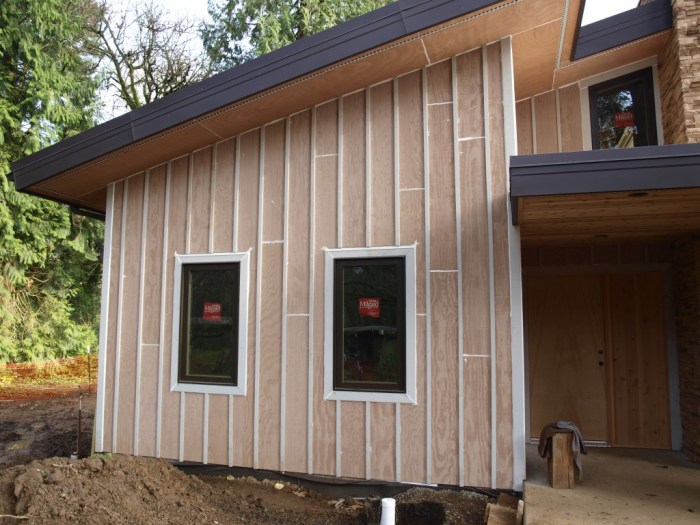
This installation features a modern farmhouse design with vertical Hardie panel siding in a warm, neutral gray. The vertical orientation emphasizes height and creates a sleek, contemporary feel. The color choice complements the natural surroundings and blends seamlessly with the home’s overall aesthetic. The panels are neatly installed, with precise cuts and consistent spacing between each plank, creating a clean and professional finish. Accents of darker gray trim around windows and doors add visual interest and break up the large expanse of siding. The overall effect is a sophisticated and inviting exterior that seamlessly combines modern and rustic elements.
Example 2: Traditional Colonial with Horizontal Panel Orientation
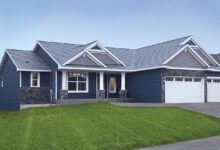
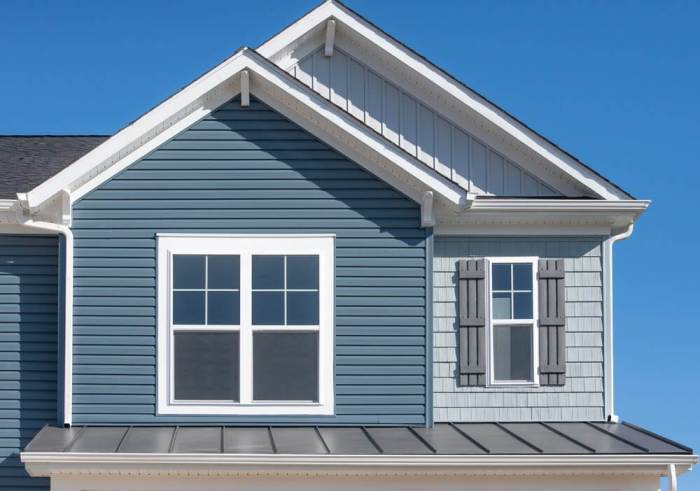
This example showcases a traditional colonial-style home with horizontal Hardie panel siding in a classic, deep blue-gray. The horizontal orientation is traditional and provides a sense of width and stability. The deep blue-gray color adds a touch of sophistication and complements the home’s architectural details. The installation features a combination of larger panels for the main walls and smaller panels for trim around windows and doors. This use of varied panel sizes adds visual interest and texture. White trim around the windows and doors contrasts sharply with the dark siding, creating a visually striking effect. The overall impression is one of timeless elegance and refined charm.
Example 3: Contemporary Coastal Home with Lap Siding and Mixed Panel Orientation
This contemporary coastal home utilizes a combination of horizontal and vertical Hardie panel lap siding in a light, sandy beige. The lap siding provides texture and depth, creating a visually interesting surface. The light beige color perfectly complements the coastal setting, blending seamlessly with the surrounding environment. A mix of horizontal and vertical panel orientation creates a dynamic and modern feel, breaking up the large expanses of siding. Darker brown trim around windows and doors adds contrast and visual interest. The overall effect is a relaxed and inviting exterior that evokes a sense of casual sophistication and seaside charm.
| Example | Panel Orientation | Color Choice | Aesthetic |
|---|---|---|---|
| Modern Farmhouse | Vertical | Warm, Neutral Gray | Sleek, Contemporary, Inviting |
| Traditional Colonial | Horizontal | Classic, Deep Blue-Gray | Timeless, Elegant, Refined |
| Contemporary Coastal | Lap Siding (Horizontal & Vertical) | Light, Sandy Beige | Relaxed, Sophisticated, Seaside Charm |
Mastering Hardie panel installation unlocks the potential to dramatically enhance your home’s curb appeal and longevity. From the initial planning stages to the final finishing touches, attention to detail and adherence to best practices are key to a successful project. By understanding the nuances of material selection, proper tool usage, and effective troubleshooting techniques, you’ll be well-equipped to tackle this project with confidence. Remember, investing the time in thorough preparation and precise execution translates to a stunning, durable, and long-lasting exterior for years to come. Now go forth and create a beautiful, weather-resistant façade!
FAQ Guide: Hardie Panel Installation
What is the lifespan of Hardie panel siding?
Hardie panel siding, with proper installation and maintenance, can last for 30 years or more.
Can I install Hardie panels myself, or do I need a professional?
While DIY installation is possible, particularly for smaller projects, professional installation is recommended for larger or more complex projects to ensure proper technique and a long-lasting result.
How much does Hardie panel installation typically cost?
The cost varies significantly depending on factors such as project size, labor costs, and the type of Hardie panel used. It’s best to obtain multiple quotes from reputable contractors.
What kind of warranty does Hardie offer on its panels?
James Hardie offers a 30-year limited warranty on its products. The specific terms and conditions are Artikeld in their warranty documentation.
How do I clean Hardie panel siding?
Regular cleaning with a garden hose and a soft brush is usually sufficient. For stubborn stains, a mild detergent solution can be used. Avoid harsh chemicals or pressure washers.
