Hardie Board Trim A Complete Guide
Hardie board trim elevates exterior design, offering a durable and aesthetically pleasing alternative to traditional materials. This comprehensive guide delves into every aspect of Hardie board trim, from its composition and installation to its long-term cost benefits and maintenance. We’ll explore the various design possibilities, compare it to other options, and equip you with the knowledge to make informed decisions for your next project. Whether you’re a seasoned professional or a DIY enthusiast, this guide provides a practical and insightful journey into the world of Hardie board trim.
From understanding the material’s unique properties and exploring different installation techniques to mastering maintenance and repair, we’ll cover everything you need to know. We’ll also examine the impact of Hardie board trim on curb appeal and property value, showcasing its versatility across various architectural styles. Get ready to discover why Hardie board trim is a top choice for homeowners and builders alike.
Hardie Board Trim
Hardie board trim, a popular choice for exterior home renovations and new construction, offers a compelling blend of durability, low maintenance, and aesthetic appeal. Understanding its composition, manufacturing process, and performance characteristics is crucial for homeowners and contractors alike. This detailed look at Hardie board trim will equip you with the knowledge to make informed decisions about your next project.
Hardie Board Trim Composition and Manufacturing
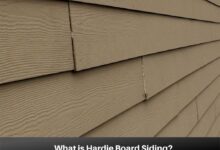
Hardie board trim is primarily composed of cement, cellulose fibers, and other additives. The cement provides strength and durability, while the cellulose fibers act as a binding agent, creating a composite material that is both strong and lightweight. The exact formulation may vary slightly depending on the specific product line, but the core ingredients remain consistent. The manufacturing process involves mixing these ingredients into a slurry, which is then formed into the desired shapes and sizes. This mixture is then pressed and cured under high pressure and temperature, resulting in a dense, durable board. The final product undergoes a finishing process, which can include painting or texturing, to achieve the desired aesthetic.
Hardie Board Trim Durability Compared to Other Materials
Compared to traditional wood trim, Hardie board offers superior resistance to rot, insect infestation, and moisture damage. Wood, while aesthetically pleasing, requires regular maintenance, including painting or staining, to prevent deterioration. Vinyl trim, another popular alternative, is also resistant to rot and insects, but it can be more susceptible to damage from impacts and extreme temperatures. Hardie board strikes a balance, offering excellent durability without the high maintenance needs of wood or the fragility of vinyl. In high-impact areas, Hardie board might show some minor damage but will not rot or require extensive repairs like wood. In areas with extreme temperature fluctuations, Hardie board maintains its structural integrity better than vinyl, which can become brittle and crack.
Hardie Board Trim Finishes and Maintenance
Hardie board trim is available in a variety of finishes, including primed, pre-painted, and textured options. Primed trim requires painting after installation, allowing for greater customization. Pre-painted trim offers convenience, eliminating the need for on-site painting. Textured finishes provide a more rustic or detailed look. Regardless of the chosen finish, Hardie board requires minimal maintenance. Regular cleaning with water and a mild detergent is usually sufficient. For pre-painted trim, repainting may be necessary every 5-10 years depending on environmental factors and sun exposure. Unlike wood, Hardie board does not require regular sealing or staining.
Hardie Board Trim: Pros and Cons Compared to Alternatives
| Feature | Hardie Board | Wood | Vinyl |
|---|---|---|---|
| Durability | Excellent; resists rot, insects, and moisture | Good; susceptible to rot, insects, and moisture damage | Good; can be brittle and prone to impact damage |
| Maintenance | Low; occasional cleaning, repainting every 5-10 years | High; regular painting, staining, and sealing | Low; occasional cleaning |
| Cost | Moderate; more expensive than vinyl, less expensive than high-end wood | Varies greatly depending on type of wood | Low; least expensive option |
| Appearance | Versatile; available in various colors and textures | Natural and aesthetically pleasing | Can appear less natural; limited color options |
Hardie Board Trim
Hardie board trim offers superior durability and weather resistance compared to traditional wood trim, making it a popular choice for homeowners and contractors alike. Its longevity and low-maintenance nature translate to long-term cost savings, justifying the slightly higher initial investment. Understanding proper installation techniques is crucial to maximizing its benefits and achieving a professional, long-lasting finish.
Tools and Equipment for Hardie Board Trim Installation
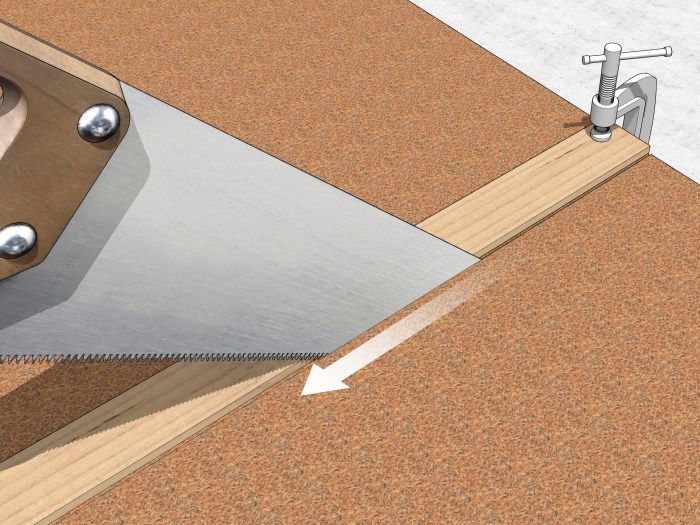
Successful Hardie board trim installation hinges on having the right tools. Improper tools can lead to inaccurate cuts, poor fastening, and ultimately, a subpar finish. Essential tools include a circular saw with a fine-tooth blade designed for cutting fiber cement, a measuring tape, a speed square, a level, a nail gun (specifically designed for Hardie board, using appropriate fasteners), safety glasses, work gloves, a caulking gun, and various types of caulk (specifically designed for exterior use and compatible with Hardie board). Consider adding a jigsaw for intricate cuts and a miter saw for precise angled cuts, especially for corner pieces. Finally, a utility knife can be handy for trimming caulk and making minor adjustments.
Step-by-Step Hardie Board Trim Installation Process
Installation follows a consistent process regardless of the specific application. Begin by accurately measuring and marking the trim pieces to the required lengths. Precise cuts are paramount; use a circular saw or miter saw for straight cuts and a jigsaw for more complex shapes. Next, pre-drill pilot holes before fastening the trim to the underlying structure. This prevents splitting and ensures a secure hold. Use galvanized nails or screws specifically designed for Hardie board; these fasteners are corrosion-resistant and provide superior holding power. Always maintain proper spacing between fasteners as recommended by the manufacturer. After fastening, apply a high-quality exterior-grade caulk to seal all joints and gaps, ensuring a weathertight and aesthetically pleasing finish. Caulk should be applied neatly and smoothed with a wet finger or a caulking tool.
Ensuring Proper Alignment and a Professional Finish, Hardie board trim
Achieving a professional finish requires meticulous attention to detail throughout the installation process. Consistent use of a level is crucial to ensure the trim is perfectly plumb and straight. Pay close attention to mitered corners, ensuring a tight, seamless fit. If necessary, use shims to adjust the alignment before fastening. Clean up any excess caulk immediately to avoid unsightly residue. Finally, a thorough inspection after installation will identify any imperfections that can be addressed before the caulk fully sets.
Installation Methods for Various Applications
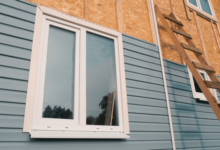
Hardie board trim installation methods vary slightly depending on the application. For instance, installing trim around windows and doors requires precise measurements and cuts to ensure a snug fit. Corner installations necessitate accurate miter cuts to create a clean, seamless joint. Soffit installation may require different fastening techniques to accommodate the specific structure. Each application demands careful planning and execution to ensure optimal results. Understanding these nuances is key to achieving a professional-looking installation.
Common Installation Mistakes and How to Avoid Them
Careful planning and execution are key to avoiding common mistakes. Here’s a visual guide, presented as bullet points, detailing frequent errors and their solutions:
- Mistake: Using incorrect fasteners. Solution: Always use galvanized nails or screws specifically designed for Hardie board. Using standard nails can lead to splitting and poor holding power.
- Mistake: Failing to pre-drill pilot holes. Solution: Always pre-drill pilot holes to prevent splitting, especially in thicker trim pieces.
- Mistake: Inaccurate cuts. Solution: Use sharp blades and appropriate tools (circular saw, miter saw, jigsaw) for precise cuts. Measure twice, cut once.
- Mistake: Neglecting to caulk joints. Solution: Thoroughly caulk all joints and gaps to ensure a weathertight seal and prevent water damage.
- Mistake: Poor alignment. Solution: Use a level frequently to ensure the trim is plumb and straight. Use shims to adjust alignment as needed.
Hardie Board Trim
Hardie board trim offers a compelling blend of durability, aesthetics, and longevity, making it a popular choice for homeowners and builders alike. Its resistance to rot, insects, and fire contributes to a low-maintenance exterior, while its versatility allows for seamless integration into a variety of architectural styles. This section delves into the design and aesthetic aspects of Hardie board trim, showcasing its impact on curb appeal and property value.
Hardie Board Trim in Various Architectural Styles
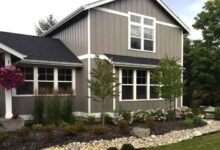
Hardie board trim’s adaptability shines through its successful application across numerous architectural styles. For instance, its clean lines and crisp edges complement the modern aesthetic, often used to accentuate the minimalist design of contemporary homes. Conversely, its ability to be molded into intricate profiles allows for seamless integration into traditional styles like Victorian or Craftsman, where ornate detailing is common. In farmhouse designs, Hardie board trim can add a touch of rustic charm, especially when paired with natural wood tones or muted color palettes. The versatility of Hardie board allows for a cohesive and stylish finish regardless of the overall architectural style.
Impact of Hardie Board Trim on Curb Appeal and Property Value
The use of Hardie board trim significantly impacts a home’s curb appeal and, consequently, its property value. High-quality trim elevates the overall appearance of a house, creating a more polished and refined look. This improved visual appeal can attract potential buyers and command a higher sale price. Studies have shown that well-maintained exterior features, including trim, contribute significantly to a home’s appraised value. The durability of Hardie board, requiring less frequent maintenance and replacement compared to wood trim, adds to its long-term value proposition. A house with pristine Hardie board trim projects an image of meticulous upkeep and attention to detail, positively influencing market perception.
Color Choices to Enhance Home Design with Hardie Board Trim
Strategic color selection for Hardie board trim can dramatically enhance a home’s overall design. For instance, a classic white trim against a dark exterior creates a striking contrast that accentuates architectural details. Conversely, using a similar color palette for the siding and trim can create a more cohesive and unified look, ideal for minimalist or contemporary designs. Subtle color variations, such as using a slightly darker shade of trim than the siding, can add depth and visual interest without being overwhelming. Bold color choices, while potentially risky, can create a statement piece, but should be carefully considered in relation to the overall architectural style and landscaping. Examples include using a deep navy blue trim on a light beige house for a nautical feel, or a vibrant red trim on a white farmhouse for a cheerful, country vibe.
Examples of Hardie Board Trim Profiles
The following Artikels three distinct Hardie board trim profiles suitable for a hypothetical house:
- Profile 1: Simple Colonial – Dimensions: 1×6 inches. Material: Hardie Plank Lap Siding in a classic white. This profile offers a clean, timeless look suitable for traditional architectural styles. It’s easy to install and provides a strong, crisp line.
- Profile 2: Modern Minimalist – Dimensions: 1×4 inches. Material: Hardie Trim Board in a charcoal grey. This sleek profile complements contemporary architecture. Its thin profile creates a clean, uncluttered look, ideal for modern homes.
- Profile 3: Ornate Victorian – Dimensions: Varying, up to 4 inches wide with intricate molding. Material: Hardie Panel in a deep cream. This elaborate profile is perfect for Victorian or Craftsman homes. The intricate design adds a touch of elegance and historical charm.
Hardie Board Trim Applications
The versatility of Hardie board trim is evident in its diverse applications:
- Image Description 1: A craftsman-style home showcases intricate Hardie board trim around windows and doors, complementing the detailed porch columns and gables. The trim is painted a deep brown, contrasting beautifully with the light beige siding. This creates a visually rich and textured exterior.
- Image Description 2: A modern farmhouse utilizes wide, simple Hardie board trim in a clean white, highlighting the clean lines of the house’s design. The lack of ornamentation emphasizes the minimalist aesthetic, while the white trim provides a bright, fresh look.
- Image Description 3: A contemporary home features narrow Hardie board trim in a dark grey, used as accents around windows and along the roofline. This creates a sophisticated, understated look that complements the home’s sleek, geometric design. The dark trim provides a nice contrast to the light-colored siding.
Hardie Board Trim
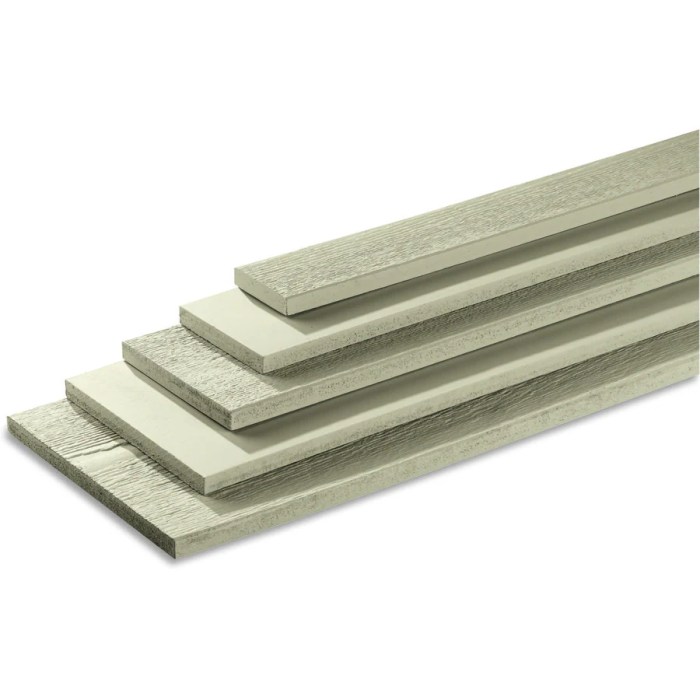
Hardie board trim, known for its durability and low-maintenance properties, isn’t entirely immune to the effects of time and the elements. Understanding potential problems and implementing a proactive maintenance plan is key to preserving its longevity and aesthetic appeal. This section will detail common issues, cleaning and repair procedures, and a preventative maintenance schedule to keep your Hardie board trim looking its best for years to come.
Hardie Board Trim Problems and Their Causes
Several factors can contribute to damage in Hardie board trim. Moisture intrusion, a primary culprit, can lead to issues like cracking, warping, and the growth of mold or mildew. This often stems from improper installation, allowing water to seep behind the trim, or from inadequate caulking around joints and seams. Physical impact, such as accidental bumps from lawnmowers or other objects, can cause dents and scratches. Extreme temperature fluctuations can also contribute to cracking over time, particularly in regions with significant seasonal temperature swings. Finally, exposure to prolonged UV radiation can lead to fading and discoloration of the trim’s finish.
Cleaning and Maintaining Hardie Board Trim
Regular cleaning is essential for preventing damage and maintaining the appearance of your Hardie board trim. A simple solution of mild detergent and water, applied with a soft-bristled brush or sponge, is usually sufficient for removing dirt and grime. For stubborn stains, a pressure washer can be effective, but it’s crucial to maintain a safe distance to avoid damaging the surface. Always rinse thoroughly with clean water after cleaning. After cleaning, inspect the trim for any signs of damage, paying close attention to caulking around joints and seams. Reapply caulking as needed to prevent water penetration.
Repairing Minor Damage to Hardie Board Trim
Minor scratches and dents can often be repaired with relative ease. For shallow scratches, a light sanding followed by a touch-up paint matching the trim’s color can effectively conceal the damage. For small dents, carefully filling the dent with a suitable wood filler designed for exterior use, sanding smooth, and then painting, will restore the trim’s surface. Always allow sufficient drying time between each step and ensure the paint is compatible with the Hardie board’s finish.
Replacing Damaged Sections of Hardie Board Trim
More extensive damage, such as significant cracks or broken sections, may require replacing the affected area. This involves carefully removing the damaged section, ensuring a clean cut to facilitate proper installation of the replacement piece. Measure the area accurately to ensure a precise fit for the new trim. Secure the new piece using appropriate fasteners, ensuring proper alignment and spacing. Finally, caulk all seams and joints to prevent moisture intrusion.
Preventative Maintenance Schedule for Hardie Board Trim
A preventative maintenance schedule is crucial for extending the life of your Hardie board trim. Here’s a recommended plan:
- Annual Inspection: Conduct a thorough visual inspection of all trim, checking for cracks, dents, loose fasteners, and signs of moisture damage. Address any issues promptly.
- Spring Cleaning: Clean the trim using a mild detergent and water solution. Pay particular attention to areas prone to dirt and grime buildup.
- Caulk Inspection and Repair (Biennial): Inspect all caulked joints and seams for cracks or gaps. Reapply caulking as needed to prevent water penetration.
- Painting (Every 5-7 Years): Depending on the climate and sun exposure, repaint the trim to maintain its color and protect it from UV damage. Choose a high-quality exterior paint designed for fiber cement.
Hardie Board Trim
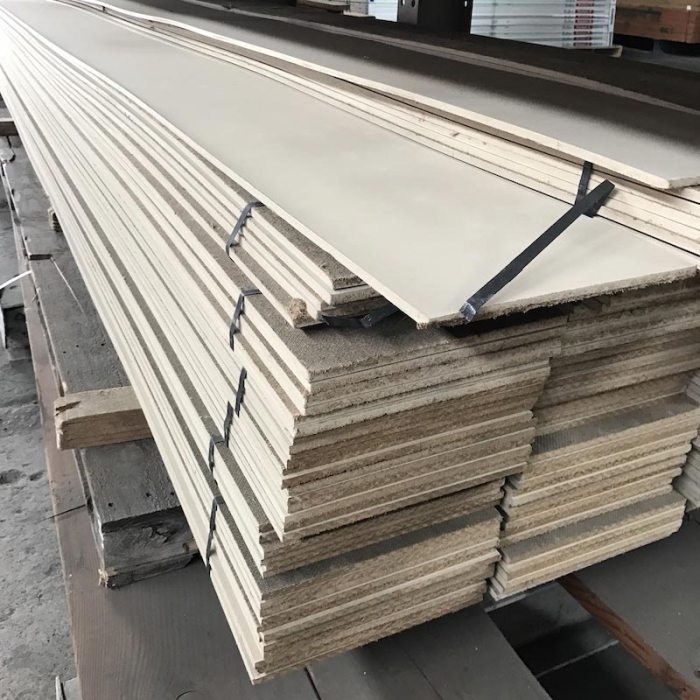
Hardie board trim, a popular choice for exterior home finishing, offers a compelling blend of durability, aesthetics, and longevity. Understanding its cost and environmental impact is crucial for homeowners and contractors alike, informing informed decision-making during the planning and execution phases of a project. This section delves into the financial and sustainability aspects of using Hardie board trim, providing a comprehensive overview to aid in your project evaluation.
Hardie Board Trim Cost Compared to Alternatives
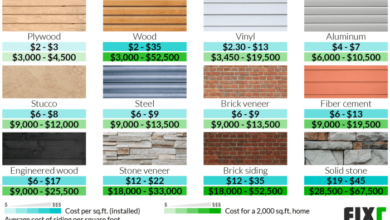
The cost of Hardie board trim varies depending on factors such as region, supplier, and the specific product chosen. Generally, it sits at a mid-range price point compared to other exterior trim materials. For example, while less expensive options like vinyl or wood might initially seem attractive, their shorter lifespan and higher maintenance requirements often negate the initial cost savings in the long run. Conversely, materials like aluminum or fiber cement alternatives may be more expensive upfront, but their performance characteristics should be carefully weighed against the total cost of ownership. A thorough cost-benefit analysis considering material cost, installation labor, and long-term maintenance is essential.
Environmental Impact of Hardie Board Trim
Hardie board trim, primarily composed of cement, sand, and cellulose fibers, boasts a relatively low environmental impact compared to some alternatives. The manufacturing process, however, does involve energy consumption and the release of greenhouse gases. Furthermore, disposal requires careful consideration; while the materials are largely inert, improper disposal can contribute to landfill issues. Choosing a supplier committed to sustainable manufacturing practices, such as those employing recycled materials or minimizing waste, is crucial for mitigating the environmental footprint. Proper recycling and responsible disposal at the end of the trim’s lifespan are also key factors to consider.
Long-Term Cost Savings of Hardie Board Trim
The durability and low maintenance requirements of Hardie board trim translate to significant long-term cost savings. Unlike wood, which is susceptible to rot, insect damage, and the need for regular repainting, Hardie board trim requires minimal upkeep. Its resistance to moisture and extreme weather conditions ensures a longer lifespan, reducing the frequency and cost of replacements. This translates into reduced labor costs associated with repairs and replacements, offering a significant return on investment over the lifetime of the product. For example, a homeowner might spend more upfront on Hardie board, but save thousands over 20 years by avoiding costly wood repairs and repainting.
Sourcing Sustainably Produced Hardie Board Trim
James Hardie, the leading manufacturer of Hardie board products, actively promotes sustainable practices in its manufacturing processes. While not all Hardie board trim is explicitly certified as “sustainable” by a third-party organization, the company’s commitment to reducing its environmental footprint should be a key consideration. Checking for certifications or inquiring directly with suppliers about their sourcing and manufacturing practices can help consumers make informed choices. Look for information regarding the percentage of recycled materials used and the company’s commitment to reducing waste and greenhouse gas emissions.
Hypothetical Hardie Board Trim Project Cost Breakdown
The following table provides a hypothetical cost breakdown for a small Hardie board trim project. Remember that these are estimates and actual costs will vary based on location, project size, and labor rates.
| Item | Quantity | Unit Cost | Total Cost |
|---|---|---|---|
| Hardie Board Trim | 100 linear feet | $5/linear foot | $500 |
| Fasteners | 1000 | $0.10/each | $100 |
| Primer | 1 gallon | $30 | $30 |
| Paint | 2 gallons | $40/gallon | $80 |
| Labor (Installation) | 8 hours | $50/hour | $400 |
| Total Estimated Cost | $1110 |
Ultimately, Hardie board trim presents a compelling case for itself as a superior exterior trim solution. Its durability, low maintenance, and aesthetic versatility make it a worthwhile investment, enhancing both the beauty and longevity of your home. By understanding its properties, installation, and maintenance requirements, you can confidently leverage Hardie board trim to achieve a stunning and lasting exterior finish. The information provided here empowers you to make informed decisions, transforming your vision into a reality.
FAQ Resource
Can Hardie board trim be painted?
Yes, Hardie board trim can be painted with exterior-grade paints designed for fiber cement. Proper preparation, including priming, is crucial for optimal adhesion and longevity.
How long does Hardie board trim last?
With proper installation and maintenance, Hardie board trim can last for decades, significantly outlasting many other trim materials.
Is Hardie board trim resistant to insects and pests?
Yes, unlike wood, Hardie board trim is naturally resistant to insect infestation and rot, reducing maintenance needs.
What is the best way to clean Hardie board trim?
Regular cleaning with a mild detergent and water, followed by rinsing, is usually sufficient. Avoid abrasive cleaners.
Can I install Hardie board trim myself?
While possible for DIYers, professional installation is often recommended, especially for complex projects, to ensure proper alignment and a lasting finish.
