Fiber Cement Siding Installation A Complete Guide
Fiber cement siding installation is more than just slapping up some panels; it’s about creating a durable, beautiful, and long-lasting exterior for your home. This comprehensive guide dives deep into every stage of the process, from initial planning and preparation to the final finishing touches. We’ll cover everything you need to know to tackle this project with confidence, whether you’re a seasoned DIYer or a first-time installer. Get ready to transform your home’s curb appeal with this low-maintenance, high-impact siding option.
We’ll explore the advantages of fiber cement over other materials, detail the necessary tools and techniques, and offer practical solutions to common installation challenges. This isn’t just a how-to; it’s a deep dive into the nuances of fiber cement siding installation, ensuring you achieve professional-level results.
Introduction to Fiber Cement Siding
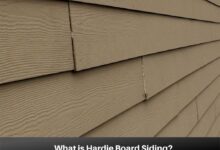
Fiber cement siding is a popular exterior cladding material known for its durability and longevity. It’s a composite material, typically made from a mixture of cement, cellulose fibers (often wood pulp), and sand. These ingredients are combined, molded into siding panels, and then cured under pressure. The resulting product is a strong, relatively low-maintenance siding option that offers significant advantages over other materials.
Fiber cement siding boasts a compelling array of benefits compared to alternatives like vinyl, wood, or aluminum siding. Its superior strength and resistance to damage from impacts, wind, and moisture make it a highly durable choice. Unlike wood, it’s not susceptible to rot, insect infestation, or warping. Compared to vinyl, it doesn’t fade or dent easily and offers a more realistic wood-grain look. Its fire resistance also surpasses many other siding options. This translates to lower maintenance costs and a longer lifespan, making it a cost-effective solution in the long run.
Fiber Cement Siding Lifespan and Maintenance
Fiber cement siding is renowned for its exceptional longevity. With proper installation and regular maintenance, it can easily last for 50 years or more, significantly outlasting many other siding materials. This extended lifespan contributes significantly to the overall value and curb appeal of a home. Maintenance requirements are minimal. Regular cleaning with a pressure washer, or simply a garden hose, is sufficient to remove dirt and debris. Occasional repainting may be needed, depending on exposure to the elements and the chosen paint type, but the frequency is generally lower than with wood siding. Addressing minor chips or cracks promptly will prevent further damage and extend the siding’s life. For example, a small crack might be easily repaired with a patching compound, preventing the need for a more extensive repair later. Proper caulking around windows and doors is also crucial to prevent water infiltration and subsequent damage.
Pre-Installation Preparations
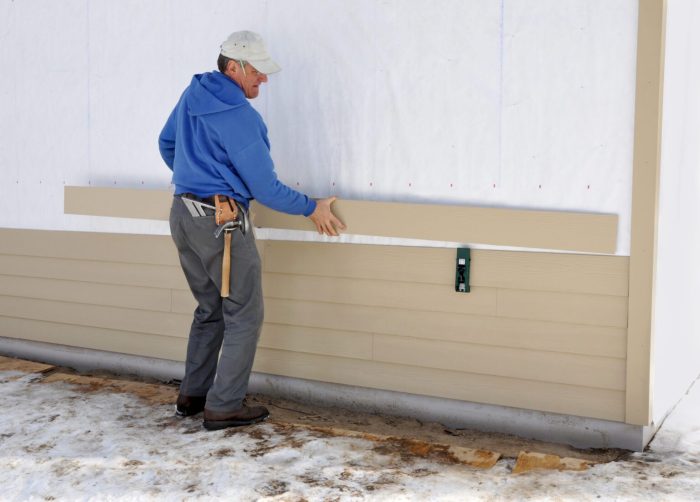
Proper preparation is paramount to a successful fiber cement siding installation. Failing to adequately prepare the wall surface can lead to issues ranging from unsightly gaps and uneven finishes to premature siding failure. This section details the essential tools, materials, and procedures for preparing your home’s exterior for a long-lasting, professional-looking installation.
Thorough preparation minimizes future problems and ensures a smooth installation process. Think of it as laying the foundation for a strong, beautiful finish. Cutting corners here will inevitably cost you time and money later.
Necessary Tools and Materials
Having the right tools and materials readily available streamlines the installation process and prevents costly delays. A well-stocked arsenal ensures efficiency and a quality finish.
- Measuring tape and level
- Chalk line
- Safety glasses and gloves
- Circular saw with a carbide-tipped blade designed for fiber cement (or a scoring tool and a snap cutter for cleaner cuts)
- Jigsaw (for intricate cuts)
- Hammer and nails (or appropriate fasteners for your siding system)
- Caulk gun and appropriate caulk
- Putty knife and scraper
- Primer and paint brushes or roller
- Wood filler and sandpaper
- Ladder and scaffolding (if necessary)
- Fiber cement siding panels
- Flashing and trim
- Underlayment (if required)
Wall Surface Preparation
The condition of your existing wall directly impacts the success of your fiber cement siding installation. Addressing any issues before installation prevents future problems and ensures a long-lasting, attractive finish.
- Cleaning: Remove all loose debris, dirt, paint, and any other contaminants from the wall surface using a pressure washer or stiff brush. Ensure the surface is completely clean and dry before proceeding.
- Repair: Inspect the wall for any damage, such as cracks, holes, or loose siding. Repair any damaged areas using wood filler or appropriate patching materials. Allow sufficient drying time before sanding smooth and priming.
- Priming: Applying a high-quality primer specifically designed for exterior use and compatible with fiber cement siding creates a uniform surface for the siding and helps prevent moisture penetration. Two coats are generally recommended for optimal protection.
Measuring and Cutting Fiber Cement Siding Panels
Accurate measurement and cutting are critical for a professional-looking installation. Improper cuts can lead to gaps, wasted material, and an overall unsatisfactory result. Using the right tools and techniques is key.
Always measure twice and cut once. Use a sharp carbide-tipped blade to minimize chipping and ensure clean cuts. When using a circular saw, support the panel firmly to prevent bending or breaking. For intricate cuts, a jigsaw is recommended. Remember to wear safety glasses and a dust mask when cutting fiber cement siding to protect against airborne particles.
Always pre-drill pilot holes before fastening to prevent cracking or splitting the panels.
Installation Methods and Techniques
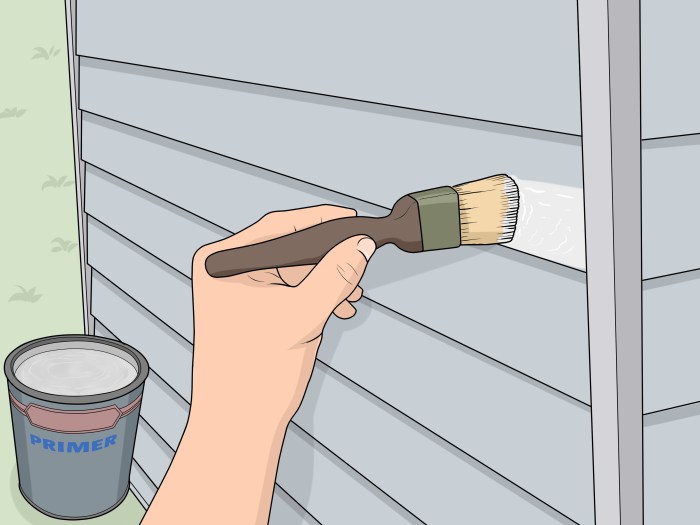
Fiber cement siding installation requires careful consideration of the chosen method and precise execution of techniques to ensure a durable and aesthetically pleasing finish. The specific method you select will depend on factors like the building’s architectural style, your budget, and the complexity of the project. Proper installation techniques are crucial for preventing issues like water damage, cracking, and premature failure.
Different installation methods offer unique advantages and disadvantages. Understanding these nuances will help you make informed decisions throughout the process. Proper fastening techniques are paramount for a long-lasting installation. Incorrect nailing can lead to significant problems down the road, impacting both the look and the structural integrity of your siding.
Fiber Cement Siding Installation Methods
The choice of installation method significantly impacts the final appearance and the overall project complexity. Below is a comparison of common methods, highlighting their respective pros and cons and typical applications.
| Method | Advantages | Disadvantages | Typical Applications |
|---|---|---|---|
| Lap Siding | Classic look, relatively easy installation, good weather protection | Can be labor-intensive for large areas, requires precise overlap for watertight seal | Traditional homes, residential buildings, craftsman style |
| Shiplap Siding | Clean, modern aesthetic, provides a seamless appearance | Can be more challenging to install than lap siding, requires precise alignment | Contemporary homes, modern farmhouses, minimalist designs |
| Vertical Siding | Creates a visually striking vertical accent, can make a building appear taller | Requires more precise cutting and installation, may not be suitable for all climates | Modern homes, contemporary designs, accent walls |
Installing Starter Strips, J-Channels, and Corner Trim
Proper installation of these components is fundamental for a neat and watertight finish. These elements provide a solid base for the siding panels and protect vulnerable areas from the elements. Failure to install these correctly can lead to water infiltration and damage.
- Starter Strip Installation: Begin by installing a level starter strip along the bottom edge of the wall. Ensure it is securely fastened using appropriate fasteners and aligned with the building’s foundation. This provides a straight and consistent starting point for the siding panels.
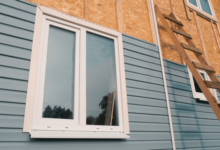
- J-Channel Installation: Install J-channels around windows and doors. Ensure the channels are plumb and level, and that they are securely fastened to the framing. The J-channel provides a neat finish around openings and protects the edges of the siding.
- Corner Trim Installation: Install corner trim at all exterior corners. Ensure the trim is tightly fitted and securely fastened to provide a clean, professional finish. The trim protects the corners of the siding from damage and provides a finished look.
Fastening Fiber Cement Siding Panels
Correct fastening is critical for the longevity and structural integrity of your fiber cement siding. Using the wrong fasteners, improper spacing, or insufficient penetration depth can lead to damage and premature failure of the siding. The following guidelines ensure a robust and lasting installation.
- Nail Type and Size: Use galvanized, corrosion-resistant nails specifically designed for fiber cement siding. The nail size should be appropriate for the thickness of the siding and the underlying sheathing.
- Nail Spacing: Maintain consistent nail spacing according to the manufacturer’s recommendations. This usually involves spacing nails every 6-8 inches along the edges and every 12-16 inches in the field.
- Penetration Depth: Drive nails deep enough to secure the siding without penetrating completely through the panel. The nail head should be slightly countersunk, but not so deep that it causes damage to the siding.
- Fastener Placement: Avoid driving nails too close to the edges of the siding panels. This can weaken the panel and increase the risk of cracking or splitting. Follow manufacturer’s guidelines for fastener placement.
Handling and Cutting Fiber Cement Siding: Fiber Cement Siding Installation
Fiber cement siding, while durable and aesthetically pleasing, requires careful handling and precise cutting techniques to avoid damage and ensure a professional-looking installation. Improper handling can lead to chipping, cracking, or breakage, while inaccurate cutting can compromise the structural integrity of the siding and the overall appearance of your project. Understanding the proper procedures for both handling and cutting is crucial for a successful installation.
Fiber cement panels are relatively heavy and can be prone to damage from impacts and drops. Always use appropriate lifting techniques and support the panels adequately to prevent stress fractures or breakage. Store panels flat on a clean, dry surface, protected from moisture and extreme temperatures. Avoid stacking panels too high to prevent bowing or damage from the weight. When transporting panels, use straps or other securing devices to prevent shifting and potential damage during transit. Remember that even minor damage to a panel during handling can affect its final appearance and its ability to perform as intended.
Safe Handling Procedures for Fiber Cement Siding, Fiber cement siding installation
Safe handling minimizes the risk of injury and damage to the siding. Always lift panels with two people, using appropriate lifting techniques to distribute the weight evenly. Wear work gloves to protect your hands from splinters and rough edges. Use a panel carrier or lifting device for larger or heavier panels to reduce strain and risk of injury. When carrying panels, maintain a balanced stance and avoid sudden movements. Never drop or throw panels. Before starting any cutting operation, inspect the panel for any pre-existing damage.
Cutting Fiber Cement Siding with Various Tools
Cutting fiber cement siding requires specialized tools and techniques. The choice of tool depends on the cut type and the desired precision.
Cutting with a Circular Saw
A circular saw equipped with a carbide-tipped blade specifically designed for fiber cement is the most efficient method for cutting straight lines. Prior to cutting, always mark the cut line clearly and securely clamp the panel to a stable work surface. Use a fine-tooth, carbide-tipped blade to minimize chipping and ensure a clean cut. Maintain a steady speed and avoid excessive pressure on the blade. Wear appropriate safety gear, including eye protection, a dust mask, and hearing protection. The high-speed rotation of the blade generates considerable dust, which is harmful to inhale. Also, the high-pitched whine can damage your hearing over time.
Cutting with a Hand Saw
For smaller cuts or more intricate shapes, a hand saw with a fine-tooth blade can be used. This method requires more time and effort, but it offers greater control and precision. Use a scoring tool to make a starting cut to prevent chipping. Make slow, steady strokes to prevent the blade from binding or breaking. Again, wear appropriate safety gear, including eye protection and a dust mask. Even though the process is slower, dust generation is still a concern.
Cutting with a Jigsaw
A jigsaw is useful for curved cuts or intricate shapes. Use a fine-tooth blade specifically designed for fiber cement. Clamp the panel securely and use a slow, steady speed. Use a scoring tool to make a starting cut, to prevent chipping. Remember to wear appropriate safety gear.
Importance of Personal Protective Equipment (PPE)
Using appropriate PPE is paramount during the cutting and installation of fiber cement siding. This includes safety glasses or a face shield to protect your eyes from flying debris, a dust mask or respirator to prevent inhalation of harmful silica dust, hearing protection to reduce noise exposure, and work gloves to protect your hands. Long sleeves and pants are also recommended to protect your skin from abrasions. Failure to use appropriate PPE can lead to serious injury or long-term health problems. The silica dust generated during cutting is a known carcinogen.
Finishing Touches and Caulking
Proper finishing touches and meticulous caulking are critical for a long-lasting, watertight fiber cement siding installation. Overlooking these steps can lead to costly repairs down the line, compromising the structural integrity and aesthetic appeal of your home. This section details the crucial processes involved in achieving a professional-quality finish.
Installing flashing and trim around windows and doors creates a barrier against water penetration, preventing moisture from seeping behind the siding and causing damage. Correct caulking techniques are equally vital, forming a continuous seal that prevents water ingress. Choosing the right caulking material is paramount, as is applying it correctly to ensure maximum effectiveness.
Flashing and Trim Installation
Flashing is installed to divert water away from vulnerable areas like window and door frames. It’s typically a thin, flexible metal sheet that’s placed under the siding, creating an overlapping barrier that channels water to the exterior. Trim pieces, often made of the same material as the siding or a complementary material, cover the flashing and provide a neat, finished appearance. The flashing should extend beyond the window or door frame and overlap with the surrounding siding, creating a watertight seal. The trim pieces are then carefully fitted and secured, covering the edges of the flashing and creating a smooth transition between the siding and the window or door. Accurate measurements and precise cutting are essential to ensure a perfect fit and prevent gaps. Proper nailing or screwing is also vital, securing the trim firmly without damaging the underlying flashing.
Caulking Techniques for Watertight Seals
Selecting the appropriate caulking material is essential. Exterior-grade, paintable acrylic latex caulk is a common choice for its flexibility, durability, and ease of application. Silicone caulk offers superior water resistance but can be more challenging to work with and may not adhere as well to all surfaces. Butyl rubber caulk provides excellent adhesion and durability, but is less flexible than acrylic latex. The choice depends on the specific application and environmental conditions. Application involves ensuring the surfaces are clean, dry, and free of debris. The caulk should be applied in a continuous bead, pressing it firmly into the joint to ensure complete filling. A smoothing tool can help create a neat, professional finish. Overfilling should be avoided, as this can lead to cracking and compromising the seal. Allowing adequate curing time before painting is also important.
Appearance of a Correctly Installed and Finished Fiber Cement Siding Installation
A properly installed fiber cement siding installation presents a clean, uniform appearance. Seams between the siding panels should be tight and consistent, with no visible gaps or irregularities. The trim around windows and doors should be neatly fitted and aligned, providing a smooth transition between the siding and the framing. The caulking should be smooth and inconspicuous, with no visible gaps or cracks. The overall finish should be free of imperfections, with a consistent color and texture throughout. The siding should appear securely fastened, with no loose panels or visible fasteners. The overall impression should be one of quality and durability, reflecting the careful attention to detail involved in the installation process.
Troubleshooting Common Installation Issues
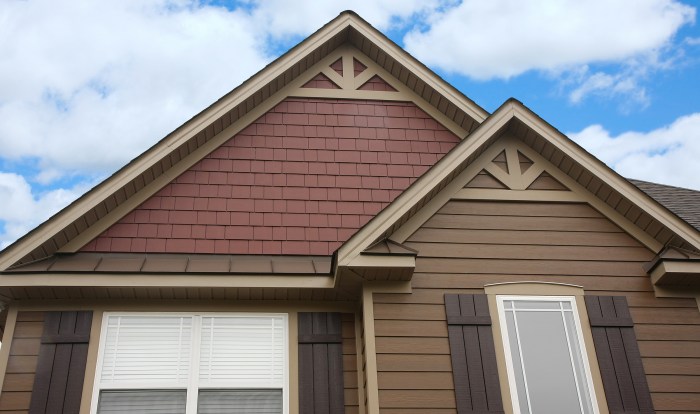
Fiber cement siding, while durable and attractive, can present installation challenges if not handled correctly. Understanding common problems and their solutions is crucial for a successful project, minimizing costly repairs and ensuring a long-lasting, beautiful exterior. This section Artikels frequent issues, their causes, solutions, and preventative measures. By addressing these potential problems proactively, you can significantly improve the quality and longevity of your fiber cement siding installation.
Common Fiber Cement Siding Installation Problems and Solutions
Addressing problems during fiber cement siding installation requires a systematic approach. Identifying the root cause is key to implementing the correct solution and preventing recurrence. The following table details common issues, their causes, effective solutions, and preventative strategies.
| Problem | Cause | Solution | Prevention |
|---|---|---|---|
| Improper Fastening | Using incorrect fasteners, inconsistent spacing, or driving fasteners too deep or shallow. | Remove incorrectly fastened siding panels. Use the correct fasteners (galvanized nails or screws specified by the manufacturer) and ensure consistent spacing according to manufacturer’s instructions. If fasteners are driven too deep, carefully remove them and reinstall with correct depth. If too shallow, add additional fasteners to ensure secure attachment. | Use a fastener gauge to maintain consistent spacing and depth. Pre-drill pilot holes for screws to prevent splitting. Carefully follow manufacturer’s fastening instructions. |
| Gaps Between Panels | Improper panel alignment, insufficient expansion space, or warping of panels due to improper handling or exposure to moisture. | For small gaps, use paintable caulk designed for exterior use. For larger gaps, the affected panel(s) may need to be removed and reinstalled, ensuring proper alignment and expansion space. If warping is suspected, check for moisture damage and replace affected panels. | Ensure proper panel alignment during installation. Leave appropriate expansion space as specified by the manufacturer. Properly store and handle panels to prevent warping. |
| Cracked or Damaged Panels | Rough handling during transport, installation, or impact damage after installation. | Replace the damaged panel(s). Exercise extreme caution when handling and installing panels. Use protective gear to prevent accidental damage. | Handle panels with care, using appropriate lifting techniques and protective gear. Protect installed siding from potential impact damage during construction. |
| Water Penetration | Improper caulking, gaps around windows and doors, or damaged flashing. | Inspect caulking and flashing for damage. Reapply caulk where necessary, ensuring a watertight seal. Replace damaged flashing. Address any gaps around windows and doors with appropriate sealant. | Use high-quality caulk and flashing materials. Ensure proper installation of windows and doors, paying close attention to sealing around frames. Regularly inspect for damage and address any issues promptly. |
| Siding discoloration | Exposure to harsh weather conditions or use of improper cleaning solutions. | Clean the siding with a solution of mild detergent and water, then rinse thoroughly. For stubborn stains, consult the manufacturer’s recommendations for cleaning products. Consider repainting or replacing severely discolored panels. | Regularly clean the siding to remove dirt and debris. Use only manufacturer-approved cleaning solutions. |
Mastering fiber cement siding installation isn’t just about following instructions; it’s about understanding the material’s properties and applying the right techniques for a flawless finish. By following this guide and paying attention to detail, you’ll not only achieve a beautiful exterior but also significantly increase your home’s value and curb appeal. Remember, proper preparation and attention to detail are key to a successful installation that will stand the test of time. So, grab your tools, and let’s get started on transforming your home’s exterior!
General Inquiries
Can I install fiber cement siding myself, or should I hire a professional?
While DIY installation is possible, it’s a demanding project requiring precision and experience. Hiring a professional ensures a quality installation and avoids costly mistakes.
How long does fiber cement siding typically last?
With proper installation and maintenance, fiber cement siding can last 50 years or more.
What’s the best way to clean fiber cement siding?
Regularly wash with a garden hose and mild detergent. For stubborn stains, use a pressure washer on a low setting.
Is fiber cement siding fire-resistant?
Yes, fiber cement siding is highly resistant to fire, making it a safer choice than many other siding materials.
How much does fiber cement siding cost?
The cost varies depending on factors like the type of siding, labor costs, and project size. Get multiple quotes for accurate pricing.
