Exterior Vinyl Siding A Complete Guide
Exterior vinyl siding: It’s the unsung hero of home exteriors, offering a durable, low-maintenance, and surprisingly versatile option for boosting curb appeal. From classic clapboard to modern shingle styles, vinyl siding comes in a vast array of colors and textures, making it a popular choice for homeowners across the spectrum. This guide dives deep into everything you need to know about exterior vinyl siding, from installation and maintenance to cost considerations and environmental impact. Get ready to transform your home’s exterior with confidence.
We’ll cover the different types of vinyl siding available, exploring their pros and cons and helping you choose the perfect style for your home’s architecture. We’ll walk you through the installation process step-by-step, highlighting common pitfalls to avoid. You’ll learn how to maintain your siding to extend its lifespan and tackle minor repairs yourself. Finally, we’ll examine the long-term cost-effectiveness and environmental impact, equipping you with the knowledge to make an informed decision.
Types of Exterior Vinyl Siding
Choosing the right exterior vinyl siding can significantly impact your home’s curb appeal and longevity. Understanding the different styles available, their pros and cons, and their suitability for various architectural styles is crucial for making an informed decision. This section details the key types of vinyl siding, helping you select the best option for your project.
Vinyl Clapboard Siding
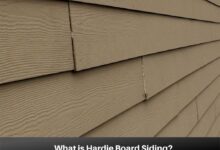
Clapboard siding, mimicking the classic wooden clapboard look, is a popular choice for its versatility and timeless appeal. The horizontal overlapping panels create a clean, traditional aesthetic that complements a wide range of home styles, from colonial to craftsman. Its ease of installation and low maintenance requirements make it a cost-effective solution. However, while durable, it can be susceptible to damage from strong impacts. A home with a traditional architectural style, such as a colonial or Cape Cod, would benefit aesthetically from clapboard siding.
Vinyl Shingle Siding
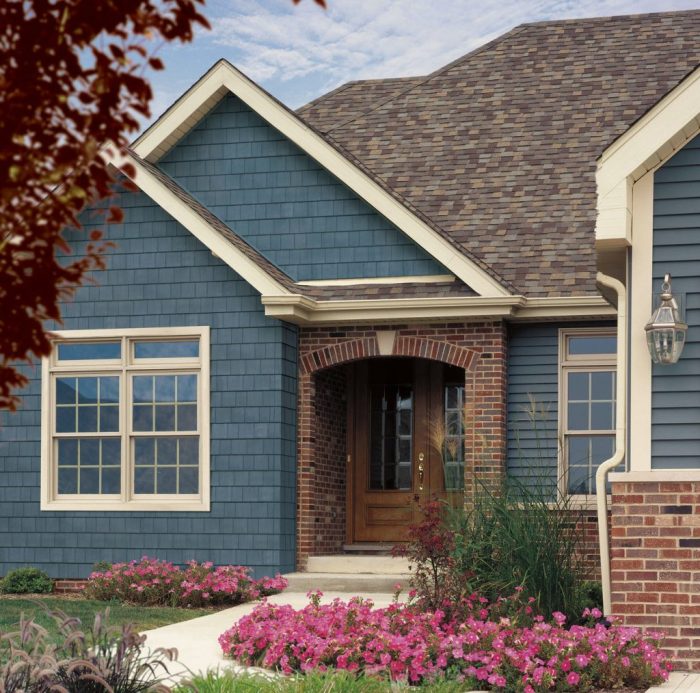
Vinyl shingle siding offers a more textured and dimensional look compared to clapboard. It’s designed to resemble wood shingles, creating a charming, rustic feel. This style is particularly well-suited for homes with a cottage, farmhouse, or Victorian architectural style. While it provides good protection from the elements, its complex design might be slightly more challenging to install than clapboard. The texture adds visual interest, but it might require more careful cleaning to prevent dirt accumulation. A charming cottage or a rustic farmhouse would look stunning with vinyl shingle siding.
Vinyl Shake Siding
Vinyl shake siding emulates the look of wood shakes, offering a rugged, natural appearance. This style is perfect for homes seeking a more rustic or informal aesthetic. It’s known for its ability to withstand harsh weather conditions, offering excellent protection. However, the thicker profile might require more attention during installation to ensure proper alignment and overlapping. A mountain cabin or a home with a contemporary rustic design would be an ideal setting for this siding.
Comparison of Vinyl Siding Types
The following table compares the durability, maintenance, and cost of various vinyl siding types. Note that prices can vary based on factors such as material quality, installer fees, and regional differences.
| Siding Type | Durability | Maintenance | Cost (Approximate Range) |
|---|---|---|---|
| Clapboard | High (resistant to rot, insects) | Low (occasional cleaning) | $3-$7 per square foot |
| Shingle | High (weather-resistant) | Medium (requires more careful cleaning) | $4-$8 per square foot |
| Shake | High (durable, weather-resistant) | Medium (requires periodic cleaning) | $5-$9 per square foot |
Installation Process of Exterior Vinyl Siding
Installing vinyl siding is a straightforward process that can significantly enhance your home’s curb appeal and protect it from the elements. However, proper installation is crucial to ensure longevity and prevent costly mistakes. This section provides a detailed guide to successfully install vinyl siding, covering the necessary tools, materials, steps, and common pitfalls to avoid.
Necessary Tools and Materials
A successful vinyl siding installation requires the right tools and materials. Using subpar tools or insufficient materials can lead to delays, poor aesthetics, and ultimately, costly repairs. The list below details the essentials for a smooth installation.
- Measuring tape: Accuracy is paramount; a reliable measuring tape is essential for precise cuts and proper alignment.
- Level: Ensuring level installation is critical for a professional look and proper water runoff. A quality level will help maintain straight lines and prevent sagging.
- Circular saw or miter saw: Precise cuts are necessary for corners, windows, and doors. A sharp blade is crucial for clean cuts and to avoid damaging the siding.
- Utility knife: Useful for trimming and smaller cuts, particularly around intricate details.
- Hammer: Needed for nailing the siding into place. A claw hammer is versatile for both nailing and removing any misplaced nails.
- Nail gun (optional but recommended): Significantly speeds up the installation process and ensures consistent nail placement.
- Safety glasses and gloves: Protecting yourself from flying debris and sharp edges is crucial for safety.
- Vinyl siding: Purchase enough siding to cover the entire area, accounting for waste and potential damage.
- J-channel, starter strip, and J-molding: These components are crucial for creating clean, professional-looking edges and corners.
- Flashing: Prevents water penetration around windows and doors.
- Caulk: Seals gaps and provides weatherproofing.
- Siding nails: Galvanized nails specifically designed for vinyl siding are essential for secure fastening without damaging the material.
Step-by-Step Installation Guide
Following a systematic approach is key to a successful installation. Each step plays a vital role in the overall aesthetic and structural integrity of the siding. Skipping steps or rushing the process can lead to significant issues down the line.
- Preparation: Begin by carefully measuring the area to be sided. This image depicts a house undergoing initial measurements before siding installation begins. The image shows a contractor meticulously measuring the walls, using a tape measure and a notepad to record the dimensions. Accurate measurements are crucial for determining the quantity of siding needed and ensuring proper planning for cuts and waste reduction. Clear the area of any obstructions, and ensure the existing wall is properly prepared (e.g., removing old siding, repairing damaged areas).
- Installation of the Starter Strip: Install the starter strip along the bottom edge of the wall. This image shows the starter strip being carefully nailed in place, ensuring it is level and straight. The image highlights the use of a level to check the alignment and the even spacing of the nails to avoid damage to the strip. The starter strip provides a base for the first row of siding and ensures a consistent starting point.
- Installing the First Row of Siding: Begin installing the first row of siding, ensuring proper overlap and alignment. This image depicts the careful placement of the first panel of siding, with attention to detail given to the alignment with the starter strip and ensuring proper overlap with the next panel. This step sets the tone for the entire installation process. Incorrect alignment here will propagate throughout the project.
- Installing Subsequent Rows: Continue installing rows of siding, ensuring proper overlap and alignment with the previous rows. This image illustrates the methodical installation of subsequent rows, showing the correct overlap and alignment to ensure a seamless and visually appealing finish. Each panel should be carefully slipped under the previous row to maintain the overlap.
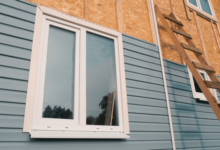
- Installing Around Windows and Doors: Use J-channel and J-molding to create a clean finish around windows and doors. This image showcases the use of J-channel and J-molding to neatly frame a window, creating a professional and watertight seal. The image emphasizes the proper placement of the molding to ensure correct water drainage.
- Finishing Touches: Once the siding is installed, caulk any gaps or seams to prevent water penetration. This image depicts the careful application of caulk around window frames and other areas where gaps might exist. This step is critical for weatherproofing and preventing future damage.
Common Installation Mistakes and How to Avoid Them
Several common mistakes can compromise the quality and longevity of a vinyl siding installation. Understanding these pitfalls and implementing preventative measures is crucial for a successful project.
- Improper Nail Placement: Using the wrong type of nails or nailing too close to the edges can damage the siding and lead to warping or cracking. Always use galvanized siding nails and maintain proper nail spacing as recommended by the manufacturer.
- Inadequate Overlap: Insufficient overlap can compromise weatherproofing and allow water penetration. Ensure proper overlap as specified by the manufacturer’s instructions.
- Neglecting Flashing: Failing to properly install flashing around windows and doors can lead to water damage. Always install flashing to prevent water from entering the walls.
- Ignoring Leveling: Failing to maintain level installation will result in an unprofessional appearance and can affect water runoff. Regularly check the level of the siding during installation.
- Using Incorrect Tools: Using dull blades or inappropriate tools can lead to damaged siding and poor installation. Ensure you have the correct tools in good condition before starting the installation.
Maintenance and Repair of Exterior Vinyl Siding
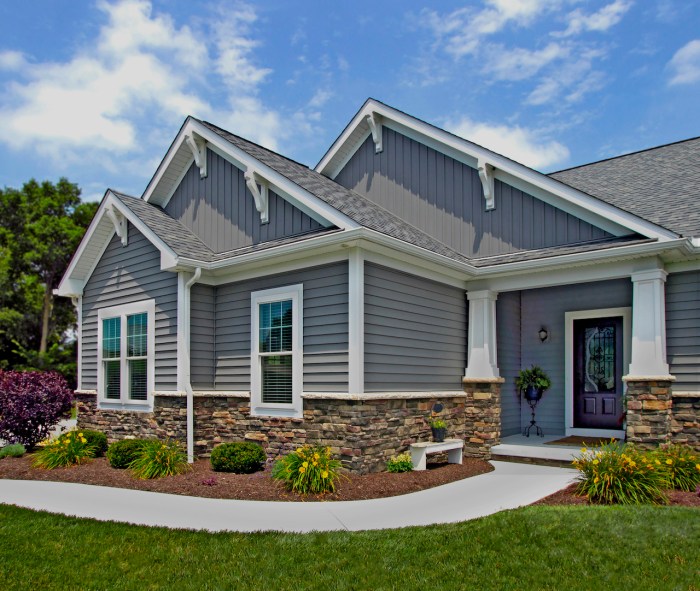
Vinyl siding, while durable, requires regular maintenance to retain its beauty and longevity. Neglecting upkeep can lead to premature aging, costly repairs, and even structural damage. This section details best practices for cleaning, addressing common problems, and performing necessary repairs.
Cleaning and Maintaining Vinyl Siding
Regular cleaning prevents dirt and grime buildup, which can accelerate fading and damage. A simple solution of mild detergent and water, applied with a soft-bristled brush or sponge, is usually sufficient. For tougher stains, consider using a pressure washer, but maintain a safe distance to avoid damaging the siding. Always rinse thoroughly with clean water afterward. Avoid harsh chemicals or abrasive cleaners, as these can scratch or discolor the vinyl. Consider the use of a garden hose with a nozzle attachment to efficiently clean large areas. For tall buildings, it might be best to hire a professional pressure washing service to ensure safety and efficiency.
Common Problems with Vinyl Siding
Several issues can affect vinyl siding over time. Fading, caused by prolonged sun exposure, is a common occurrence. The intensity of the fading depends on the color of the siding and the climate. Darker colors tend to fade faster than lighter colors. Another common problem is damage from impacts, such as hail or flying debris. This can result in dents, cracks, or holes in the siding. Additionally, moisture can penetrate damaged areas, leading to mold and mildew growth. Improper installation can also cause problems such as warping, buckling, or loose panels.
Repairing Damaged Vinyl Siding Panels, Exterior vinyl siding
Minor damage, like small dents or scratches, can often be repaired using a heat gun. Carefully apply heat to the affected area to gently reshape the vinyl. For more significant damage, replacing the affected panel is usually the best solution. This involves carefully removing the damaged panel and installing a new one, ensuring proper alignment and fastening. When replacing panels, it’s crucial to match the color and texture of the existing siding as closely as possible. For larger areas of damage or for complex repairs, it’s advisable to consult a professional siding contractor. They have the expertise and tools to handle such repairs efficiently and effectively. For example, a large hail storm might necessitate the replacement of numerous panels, a task best left to experienced professionals.
Annual Vinyl Siding Maintenance Checklist
Regular inspections and maintenance are key to extending the lifespan of your vinyl siding. A yearly checklist should include the following:
- Inspect the siding for any signs of damage, such as cracks, dents, or loose panels.
- Clean the siding thoroughly using a mild detergent and water solution or a pressure washer (used cautiously).
- Check for any signs of mold or mildew and treat accordingly using a suitable cleaning solution.
- Examine the caulking around windows and doors, and reapply if necessary.
- Inspect the gutters and downspouts to ensure proper water drainage, preventing water damage to the siding.
- Trim back any overhanging branches that might scratch or damage the siding.
Cost and Lifespan of Exterior Vinyl Siding
Choosing vinyl siding involves understanding not only its aesthetic appeal and practicality but also its long-term financial implications. The initial cost, coupled with the material’s lifespan and maintenance requirements, ultimately determines its cost-effectiveness compared to alternative cladding options. This section will delve into the factors influencing the cost of vinyl siding installation, explore the expected lifespan of various types, and compare its long-term value against materials like wood and brick.
Factors Influencing Vinyl Siding Installation Costs
Several factors significantly impact the overall cost of a vinyl siding installation project. These include the size of the house, the complexity of the installation (e.g., multiple gables, dormers, or intricate trim work), the quality of the chosen vinyl siding (premium vs. standard), labor costs in your region, and the need for additional services such as removal of existing siding or repairs to underlying sheathing. Higher-end vinyl siding, often featuring thicker profiles and enhanced color stability, commands a premium price. Similarly, regions with a higher cost of living generally reflect higher labor rates, influencing the final installation cost. For example, a project in a densely populated urban area will likely cost more than a similar project in a rural setting. The condition of the existing structure also matters; significant repairs needed before siding installation will increase the total expense.
Vinyl Siding Lifespan and Durability
The lifespan of vinyl siding varies depending on several factors, including the quality of the material, the climate, and the quality of installation. Standard vinyl siding typically lasts 20-30 years, while premium vinyl siding, often featuring a thicker gauge and enhanced UV protection, can last 40 years or more. Exposure to harsh weather conditions, such as intense sunlight, freezing temperatures, and strong winds, can accelerate degradation. Proper installation is crucial; poorly installed siding is more susceptible to damage and will have a shorter lifespan. For example, inadequate flashing around windows and doors can lead to water damage and premature failure.
Long-Term Cost Comparison: Vinyl vs. Other Cladding
Comparing the long-term cost-effectiveness of vinyl siding against other materials requires considering the initial cost, maintenance expenses, and lifespan. While vinyl siding typically has a lower initial cost than wood or brick, its lifespan is shorter. Wood siding, while aesthetically pleasing, requires regular maintenance, including painting or staining, which can significantly increase long-term costs. Brick, known for its durability, has a high initial cost but boasts a remarkably long lifespan, potentially exceeding a century with minimal maintenance. Therefore, the most cost-effective option depends on individual priorities, budget, and long-term plans for the property. For example, a homeowner prioritizing low maintenance and a moderate upfront investment might find vinyl siding ideal, while someone seeking a long-lasting, high-end aesthetic might opt for brick despite its higher initial cost.
Average Cost Range for Different Vinyl Siding Options (Including Installation)
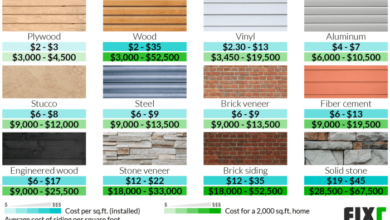
The following table illustrates the average cost ranges for different vinyl siding options, including installation, in the United States. These are estimates and can vary based on location and project specifics.
| Vinyl Siding Type | Cost per Square Foot (USD) | Total Cost (1500 sq ft house) (USD) | Lifespan (Years) |
|---|---|---|---|
| Standard Vinyl Siding | $3-$6 | $4,500 – $9,000 | 20-30 |
| Premium Vinyl Siding | $6-$10 | $9,000 – $15,000 | 30-40+ |
| Insulated Vinyl Siding | $8-$12 | $12,000 – $18,000 | 30-40+ |
| Vinyl Shake or Shingle Siding | $7-$11 | $10,500 – $16,500 | 25-35 |
Environmental Impact of Exterior Vinyl Siding
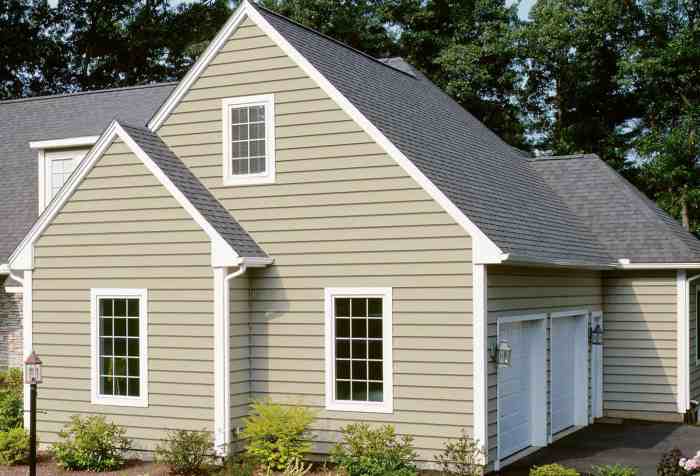
Vinyl siding, while offering durability and low maintenance, presents significant environmental considerations throughout its lifecycle. From its production to its eventual disposal, the material’s impact on the planet requires careful examination. Understanding this impact is crucial for homeowners and builders seeking environmentally responsible building practices.
Vinyl siding’s manufacturing process is energy-intensive, relying heavily on fossil fuels to produce polyvinyl chloride (PVC), the primary component. The production also releases volatile organic compounds (VOCs) and other pollutants into the atmosphere. Furthermore, the extraction and processing of raw materials, including petroleum and chlorine, contribute to environmental degradation. Disposal presents another challenge, as vinyl siding is not readily biodegradable and often ends up in landfills, contributing to plastic waste accumulation.
Manufacturing and Disposal of Vinyl Siding
The environmental footprint of vinyl siding begins with its creation. PVC production is a significant source of greenhouse gas emissions, contributing to climate change. The process also generates toxic byproducts, some of which can persist in the environment for extended periods. Disposal presents another layer of complexity. Landfilling vinyl siding contributes to long-term pollution, as PVC degrades very slowly. Incineration, while reducing landfill volume, releases harmful dioxins and furans into the air. Therefore, responsible management of both manufacturing and disposal is paramount.
Recyclability and Sustainable Disposal Options
While not widely recycled, some progress is being made in vinyl siding recycling. Several companies are developing and implementing recycling programs, focusing on reclaiming PVC for use in new products. However, these programs are not yet widespread, and the quality of recycled PVC often limits its applications. Sustainable disposal strategies beyond recycling include exploring options like material recovery and energy recovery. Material recovery involves separating and reusing the components of discarded siding, while energy recovery uses the material as a fuel source in controlled incineration facilities equipped with pollution control technologies. These alternatives offer promising pathways towards minimizing the environmental impact of vinyl siding waste.
Comparison with Other Exterior Cladding Options
Compared to other exterior cladding materials, vinyl siding’s environmental impact is a subject of ongoing debate. Wood siding, while renewable, often requires significant treatment with chemicals for preservation, potentially negating some environmental benefits. Metal siding, typically made from aluminum or steel, has a lower carbon footprint during production than vinyl but requires significant energy for its initial manufacture. Fiber cement siding, a composite material, presents a relatively lower environmental impact compared to vinyl but can be more expensive and difficult to install. The best choice depends on a comprehensive assessment of the entire lifecycle, including manufacturing, transportation, installation, maintenance, and disposal. Life cycle assessment (LCA) studies are crucial for accurate comparison of environmental impacts.
Environmental Lifecycle of Vinyl Siding: An Infographic
The following bullet points Artikel the key stages in the environmental lifecycle of vinyl siding, highlighting their respective impacts:
* Raw Material Extraction: Petroleum and salt are extracted, contributing to habitat disruption and greenhouse gas emissions. The extraction process also consumes significant energy and water resources.
* Manufacturing: PVC production is energy-intensive and releases VOCs and other pollutants. The process contributes significantly to greenhouse gas emissions and air pollution.
* Transportation: Shipping raw materials and finished products generates carbon emissions depending on the distance traveled and mode of transport.
* Installation: Installation itself contributes minimally to environmental impact, primarily through the energy used by construction equipment.
* Use Phase: The material’s longevity contributes to a reduced need for replacement, offsetting some of the initial environmental burden. However, the durability also means the material remains in the environment for a long time after its useful life.
* Disposal/Recycling: Landfilling contributes to plastic waste accumulation. Incineration releases pollutants unless equipped with appropriate emission controls. Recycling rates remain low, though efforts are underway to improve this aspect.
Choosing the Right Color and Style
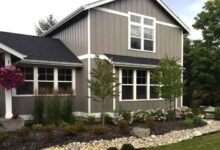
Selecting the perfect vinyl siding color and style is crucial for enhancing your home’s curb appeal and overall value. The right choices can dramatically transform the look and feel of your property, while poor choices can detract from its aesthetic appeal. Consider your home’s architectural style, surrounding landscape, and personal preferences when making your decision.
The impact of color on curb appeal is undeniable. A well-chosen color scheme can make a house appear larger, more inviting, or even more modern. Conversely, an ill-suited color can make a home look dated, smaller, or even unappealing. Think of color as a powerful tool in your home’s visual marketing; it’s the first impression potential buyers or guests will have.
Color Palettes for Various Home Styles
Choosing a color palette requires careful consideration of the architectural style of your home. Different styles lend themselves to different color schemes. A cohesive color scheme enhances the home’s character, while a clashing palette can disrupt its visual harmony.
- Victorian Homes: Victorian homes, known for their intricate details and ornate features, often benefit from rich, deep colors like deep reds, forest greens, or navy blues. These colors complement the home’s elaborate details and create a sense of grandeur. Consider adding lighter trim colors for contrast and visual interest. Imagine a deep burgundy siding with crisp white trim, highlighting the intricate window moldings and decorative elements.
- Craftsman Homes: Craftsman homes, characterized by their low-pitched roofs and natural materials, often pair well with earth tones like browns, greens, and beige. These colors blend seamlessly with the natural surroundings and emphasize the home’s connection to nature. A warm, earthy brown siding with darker brown trim could perfectly complement a Craftsman home nestled amongst trees.
- Ranch Homes: Ranch homes, known for their single-story design and clean lines, often benefit from lighter, more neutral colors like beige, gray, or light blues. These colors create a sense of spaciousness and modernity. Consider a light gray siding with white trim to accentuate the clean lines and open feel of a ranch-style home.
- Colonial Homes: Colonial homes, often featuring symmetrical facades and classic details, frequently look stunning in traditional colors like white, cream, or muted blues and greens. These colors exude timeless elegance and complement the architectural features. A classic white siding with black shutters is a timeless choice for a colonial home, emphasizing its symmetry and classic details.
Visual Guide: Siding Color and Texture Interaction with House Styles
The interplay between siding color, texture, and house style significantly influences the overall aesthetic. Texture adds depth and visual interest, while color sets the tone and mood. Careful consideration of these factors is key to achieving a harmonious and visually appealing exterior.
- Smooth Siding with Light Colors on a Cape Cod: A smooth, light-colored vinyl siding (e.g., creamy white or soft gray) on a Cape Cod style home creates a clean, classic, and airy feel. The smooth texture emphasizes the home’s simplicity, while the light color reflects light, making the home appear larger and brighter.
- Textured Siding with Dark Colors on a Victorian: A deeply textured vinyl siding (e.g., mimicking wood grain) in a dark color (e.g., deep red or forest green) on a Victorian home adds richness and depth. The texture complements the home’s intricate details, while the dark color creates a sense of drama and sophistication.
- Vertical Siding with Neutral Colors on a Farmhouse: Vertical vinyl siding in a neutral color (e.g., light gray or beige) on a farmhouse style home provides a modern yet rustic appeal. The vertical lines draw the eye upward, creating a sense of height and elegance.
- Shake-Style Siding with Earth Tones on a Craftsman: Shake-style vinyl siding (imitating wood shakes) in earth tones (e.g., browns, greens, or tans) on a Craftsman home complements the home’s natural aesthetic. The texture mimics natural materials, while the earth tones create a harmonious blend with the surrounding landscape.
Ultimately, choosing exterior vinyl siding is a significant decision impacting both the aesthetics and longevity of your home. By understanding the various types, installation processes, maintenance requirements, and long-term costs, you can make a confident choice that enhances your home’s value and curb appeal for years to come. Remember to consider your home’s architectural style, your budget, and your personal preferences when selecting the right vinyl siding for your needs. With the right information, you can transform your house into a stunning home.
Key Questions Answered
What is the average lifespan of vinyl siding?
With proper maintenance, vinyl siding can last 20-40 years or more.
Can I paint vinyl siding?
While not recommended, you can paint vinyl siding, but it may void the warranty and potentially damage the material. Proper cleaning is usually a better approach.
How much does professional vinyl siding installation cost?
Costs vary widely based on factors like the size of your home, the type of siding chosen, and regional labor rates. Expect a significant range, so get multiple quotes.
Is vinyl siding recyclable?
Some vinyl siding is recyclable, but the process isn’t always readily available. Check with your local waste management facilities for options.
How do I clean vinyl siding?
Regularly clean your vinyl siding with a mild detergent and water solution, using a soft brush or sponge. Avoid harsh chemicals.
