Burnt Wood Siding A Comprehensive Guide
Burnt wood siding, with its striking aesthetic and inherent durability, is rapidly gaining popularity as an exterior cladding option. This unique material, often achieved through techniques like shou sugi ban, offers a captivating blend of rustic charm and modern sophistication. From understanding the various types of wood and burning methods to mastering installation and budgeting, this guide delves into every aspect of working with burnt wood siding, empowering you to make informed decisions for your next project.
We’ll explore the longevity and maintenance considerations, compare its cost-effectiveness against other siding materials, and even delve into its environmental impact. Whether you’re a seasoned professional or a DIY enthusiast, this comprehensive resource will equip you with the knowledge you need to confidently incorporate this beautiful and resilient material into your design plans.
Types of Burnt Wood Siding
Burnt wood siding, also known as shou sugi ban, offers a unique blend of rustic charm and modern durability. This technique, centuries old, involves charring wood to enhance its resistance to the elements and create a striking visual effect. The process, however, yields a range of appearances depending on the wood species and the charring method employed. Understanding these variations is crucial for selecting the right siding for your project.
The choice of wood significantly impacts both the final aesthetic and the longevity of your burnt wood siding. Different wood types react differently to the charring process, resulting in varying degrees of color, texture, and durability. The burning technique itself also plays a vital role, influencing the depth of char and the overall look of the finished product.
Wood Species and Burning Techniques
Several wood species are commonly used for burnt wood siding, each possessing unique characteristics that influence the outcome of the charring process. Cedar, for example, is known for its natural resistance to rot and insects, making it a popular choice. Its light color and relatively soft texture result in a beautiful, subtly charred finish. In contrast, redwood, with its rich reddish hue and denser grain, produces a more dramatic and deeply textured surface when charred. Other suitable options include larch, pine, and even some hardwoods, though these may require more careful handling during the burning process due to their density.
The most common burning techniques include shou sugi ban (Japanese for “burnt cedar plank”) and simple charring. Shou sugi ban involves a more controlled charring process, often using a torch to achieve a consistent level of charring across the surface. Simple charring can involve a variety of methods, from open flames to specialized charring ovens, resulting in a more varied and often more deeply charred appearance. The choice of technique will influence the depth and uniformity of the charring, which in turn impacts the aesthetic qualities and durability of the siding.
Charring Level and its Effects
The level of charring directly influences both the visual appeal and the performance of burnt wood siding. Lightly charred wood retains more of its original color and texture, offering a more subtle and refined look. Heavily charred wood, on the other hand, displays a darker, almost black surface with a more pronounced textured effect. This difference in charring also affects the wood’s durability. A deeper char provides a greater level of protection against moisture, insects, and fire, extending the lifespan of the siding. However, excessively deep charring can compromise the structural integrity of the wood, making it brittle and prone to cracking.
| Wood Type | Burning Technique | Appearance | Durability |
|---|---|---|---|
| Cedar | Shou Sugi Ban (Torch) | Subtle charring, light brown to dark grey tones, relatively smooth texture | High resistance to rot and insects, moderate fire resistance |
| Redwood | Open Flame Charring | Deep charring, dark brown to black, pronounced textured surface | Excellent rot and insect resistance, high fire resistance |
| Larch | Controlled Charring Oven | Uniform charring, medium brown to dark grey, slightly textured | Good rot and insect resistance, moderate fire resistance |
| Pine | Shou Sugi Ban (Blowtorch) | Variable charring, light to medium brown, visible grain | Moderate rot and insect resistance, low fire resistance (compared to others) |
Maintenance and Longevity: Burnt Wood Siding
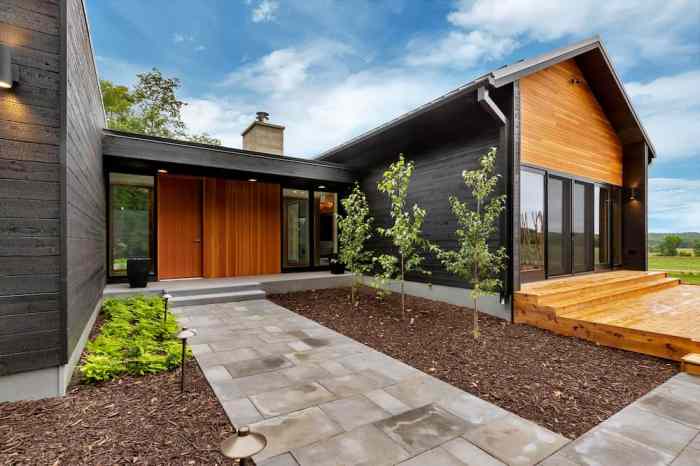
Burnt wood siding, with its striking aesthetic, offers a unique exterior cladding option. However, understanding its long-term maintenance needs and lifespan is crucial for homeowners considering this material. Proper care ensures the beauty and durability of your investment, maximizing its lifespan and minimizing potential problems.
Long-Term Maintenance Requirements
Maintaining burnt wood siding involves a proactive approach to protect the wood from the elements and prevent premature degradation. Regular cleaning is essential. Use a soft-bristled brush and a gentle solution of water and mild detergent to remove dirt, debris, and mildew. Avoid high-pressure washing, which can damage the surface. Inspect the siding regularly for any signs of damage, such as cracks, loose boards, or insect infestation. Promptly address any issues to prevent further deterioration. Consider applying a high-quality, UV-resistant sealant every few years to help protect the wood from sun damage and moisture. This preventative measure significantly extends the lifespan of your siding. Finally, remember that burnt wood, while treated, still retains some of its natural properties and will require ongoing attention.
Impact of Weather Conditions
The longevity of burnt wood siding is significantly influenced by weather conditions. Prolonged exposure to direct sunlight can lead to fading and discoloration. Excessive moisture from rain and snow can cause swelling, warping, and the potential for rot or mildew growth if not properly managed. Extreme temperature fluctuations can also cause stress on the wood, potentially leading to cracking or splitting. Areas with harsh winters or intense summers will experience more rapid degradation. Coastal areas with high salinity are also particularly challenging for wood siding, requiring more frequent maintenance and protective treatments.
Lifespan Comparison with Other Siding Materials
Choosing the right siding material depends on a variety of factors, including budget, aesthetic preferences, and maintenance considerations. Here’s a comparison of burnt wood siding with other popular options:
The lifespan of siding materials varies greatly depending on quality, installation, and climate. It’s important to factor in these variables when making a decision.
- Burnt Wood Siding:
- Pros: Unique aesthetic appeal, natural material, relatively durable with proper maintenance.
- Cons: Requires regular maintenance, susceptible to weather damage, higher initial cost than some alternatives.
- Vinyl Siding:
- Pros: Low maintenance, affordable, long lifespan (30-50 years).
- Cons: Can fade or crack over time, less aesthetically pleasing than natural materials, can be damaged by impact.
- Fiber Cement Siding:
- Pros: Durable, fire-resistant, low maintenance, long lifespan (50+ years).
- Cons: Higher initial cost than vinyl, can be brittle and susceptible to cracking if improperly installed, heavier than other options.
Installation Methods
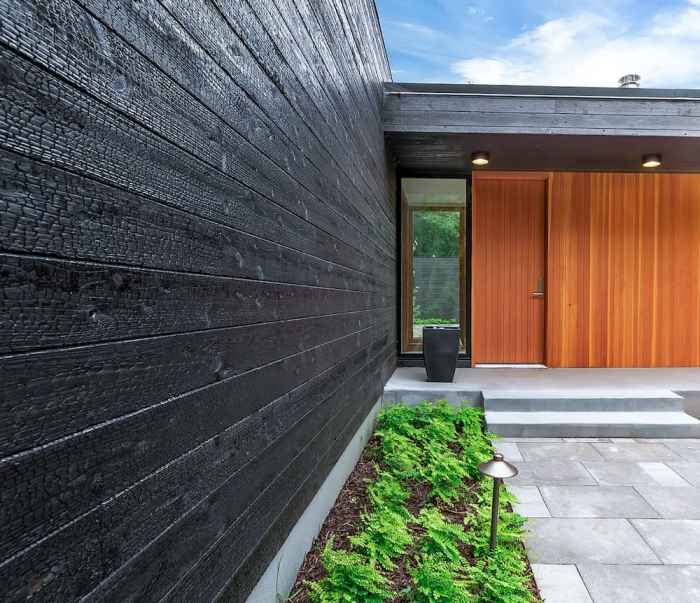
Installing burnt wood siding requires careful planning and execution to ensure a long-lasting, aesthetically pleasing result. Proper preparation and precise fastening techniques are crucial for preventing issues like warping, cracking, and fastener corrosion. Understanding different installation patterns also allows for customization of the final look and feel of your project.
Successful burnt wood siding installation hinges on several key factors: substrate preparation, proper material selection, precise measurements, and the choice of appropriate fasteners and installation patterns. Failing to address any of these aspects can compromise the longevity and visual appeal of the finished product. This section details the process step-by-step, offering insights into best practices for a professional finish.
Substrate Preparation
Before any siding is installed, the underlying surface must be thoroughly prepared. This involves ensuring a clean, dry, and level surface. Any existing siding must be removed completely. Damaged or rotted areas of the sheathing should be repaired or replaced. This step is critical as it prevents moisture buildup and ensures the siding is properly supported. A well-prepared substrate is the foundation for a successful installation.
Measuring and Cutting
Accurate measurements are essential to avoid waste and ensure a seamless fit. Measure the wall height and width, accounting for any windows or doors. Cut the burnt wood planks to the required lengths using a sharp circular saw with a fine-tooth blade, ensuring clean cuts to minimize splintering. Pre-drilling pilot holes is recommended to prevent splitting, particularly in harder wood species. Consistent cuts are crucial for a professional look.
Fastening Techniques
The choice of fasteners significantly impacts the longevity of the installation. Stainless steel fasteners are strongly recommended to prevent corrosion. They should be long enough to penetrate the siding and securely attach to the underlying structure. Avoid over-driving fasteners, which can cause damage to the wood. A close-up image would show the proper spacing between boards, highlighting the use of stainless steel fasteners. The image would clearly demonstrate the appropriate depth of penetration and the even spacing between fasteners, approximately 6 inches apart for optimal support. The fasteners should be countersunk slightly to create a flush surface.
Installation Patterns, Burnt wood siding
Several installation patterns can be used with burnt wood siding, each offering a unique visual effect. Horizontal installation is the most common, creating a classic, clean look. Vertical installation adds a modern touch, while a combination of horizontal and vertical patterns can be used for a more complex design. A diagonal installation, though more challenging, can create a dramatic and eye-catching effect. The chosen pattern should complement the overall architectural style of the building.
Step-by-Step Installation Guide
- Prepare the Substrate: Clean, dry, and level the wall surface. Repair any damage to the sheathing.
- Measure and Cut: Accurately measure the wall and cut the burnt wood planks to size, pre-drilling pilot holes.
- Install the First Row: Start at the bottom, ensuring level installation with the help of a level. Securely fasten the planks using stainless steel fasteners.
- Continue Installation: Maintain consistent spacing between boards, typically 1/4″ to 1/2″ depending on the specific wood and climate. Ensure proper overlap if necessary for water management.
- Install Trim and Accessories: Add trim pieces around windows, doors, and corners to complete the installation. This would be shown in an image depicting a neatly finished corner with appropriately sized trim pieces seamlessly integrated into the burnt wood siding. The image would clearly showcase the use of mitered corners for a clean, professional finish.
- Inspect and Finish: Inspect the entire installation for any gaps or inconsistencies. Apply a sealant or weatherproofer as needed to further protect the wood.
Cost and Budget Considerations
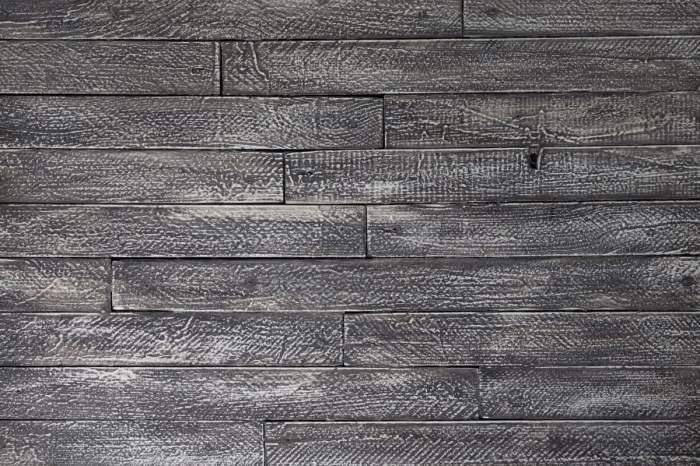
Burnt wood siding offers a unique aesthetic, but its cost is a significant factor to consider before embarking on a project. The overall expense is influenced by several interconnected elements, requiring careful planning and budgeting to ensure a successful and financially responsible outcome. Understanding these cost drivers is crucial for making informed decisions and avoiding potential financial pitfalls.
The cost of burnt wood siding is considerably higher than many traditional alternatives. This premium reflects the specialized processing involved in creating the charred finish, the often-premium wood species used, and the increased labor required for installation. Let’s delve into the specific cost components.
Material Costs
Material costs represent a substantial portion of the overall budget. The price of burnt wood siding varies significantly depending on the type of wood used (e.g., cedar, redwood, or pine), its grade, and the thickness of the planks. Premium wood species like cedar, known for their durability and resistance to rot, will command a higher price per square foot than less expensive options. The sourcing of the wood also impacts cost; locally sourced materials might be cheaper than those requiring long-distance transportation. Furthermore, the level of charring desired affects the final cost, as more extensive charring may necessitate more processing time and materials. For example, a high-end, deeply charred cedar siding could cost significantly more than a lightly charred pine alternative.
Labor Costs
Installing burnt wood siding is more labor-intensive than many other siding options. The intricate nature of the material, often involving varying lengths and widths of planks, requires skilled labor to ensure proper installation and a visually appealing finish. The labor costs depend on factors like the complexity of the project (e.g., intricate detailing or multiple angles), the size of the house, and the prevailing hourly rates for skilled carpenters in your area. Expect to pay a premium for experienced professionals capable of handling this specialized material. In areas with a high cost of living or limited skilled labor, labor costs can increase substantially.
Maintenance Costs
While burnt wood siding is naturally resistant to insects and rot due to the charring process, it still requires regular maintenance to ensure its longevity. This includes periodic cleaning to remove dirt and debris, and occasional repairs to address any damaged sections. The frequency and cost of these maintenance tasks depend on environmental factors like exposure to the elements and the climate. Coastal areas, for instance, might require more frequent cleaning due to salt spray. Regular inspection and prompt repairs can prevent minor issues from escalating into costly replacements.
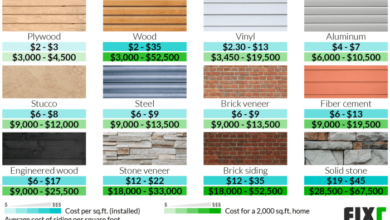
Cost Comparison with Other Siding Options
Burnt wood siding typically sits at the higher end of the siding cost spectrum. Compared to vinyl siding, which is often the most budget-friendly option, burnt wood is significantly more expensive. Fiber cement siding and traditional wood siding fall somewhere in between, with fiber cement often being a more cost-effective alternative to burnt wood, especially considering its low maintenance requirements. However, burnt wood offers a distinct aesthetic appeal that other materials can’t replicate, justifying the higher cost for some homeowners.
Sample Budget Breakdown
The following table provides a sample budget breakdown for a typical house siding project using burnt wood. Note that these are estimates, and actual costs may vary based on location, materials, and labor rates.
| Item | Quantity | Unit Cost | Total Cost |
|---|---|---|---|
| Burnt Wood Siding (Cedar) | 500 sq ft | $20/sq ft | $10,000 |
| Labor (Installation) | 500 sq ft | $15/sq ft | $7,500 |
| Materials (Fasteners, Flashing, etc.) | $1,500 | ||
| Permits and Inspections | $500 | ||
| Total Estimated Cost | $19,500 |
Environmental Impact
Choosing sustainable building materials is crucial for minimizing the environmental footprint of construction projects. Burnt wood siding, while seemingly unconventional, presents a compelling case for consideration within this context, offering a unique blend of aesthetic appeal and potential environmental benefits. However, a thorough evaluation requires a balanced look at its advantages and potential drawbacks.
The environmental sustainability of burnt wood siding hinges primarily on the sourcing of the wood and the process of shou sugi ban (the traditional Japanese method of charring wood). Responsibly sourced wood, from sustainably managed forests, significantly reduces the impact on biodiversity and carbon sequestration. The charring process itself can enhance the wood’s durability, extending its lifespan and reducing the need for frequent replacements, thereby lessening the overall environmental burden compared to materials with shorter lifespans.
Carbon Footprint Comparison
Comparing the carbon footprint of burnt wood siding to other common siding materials requires a nuanced approach. While the embodied carbon (the carbon emitted during the manufacturing and transportation of a material) of wood is generally lower than that of many manufactured materials like vinyl or aluminum, the specific carbon footprint varies depending on factors such as the wood species, the distance it travels, and the energy used in the charring process. Studies comparing the lifecycle carbon emissions of different siding materials, including life-cycle assessments (LCAs), are becoming increasingly available. For example, a hypothetical LCA might show that sustainably harvested cedar with shou sugi ban treatment has a lower carbon footprint over its lifespan than vinyl siding due to the vinyl’s manufacturing process and shorter lifespan requiring more frequent replacements. However, this needs to be considered case-by-case and verified through specific LCAs for particular products and regions.
Responsible Wood Sourcing
The responsible sourcing of wood for any construction project, including burnt wood siding, is paramount. Several certifications and organizations help ensure that the wood used comes from sustainably managed forests, minimizing environmental harm. The Forest Stewardship Council (FSC) is a widely recognized certification system that promotes responsible forest management. Seeking out suppliers and manufacturers who hold FSC certification ensures that the wood used for burnt wood siding has been harvested in an environmentally responsible manner, adhering to strict standards for forest health, biodiversity conservation, and social equity. Furthermore, investigating the origin of the wood, its transportation methods, and the energy consumption of the charring process all contribute to a comprehensive assessment of the overall environmental impact. Using reclaimed or salvaged wood is another option that can significantly reduce the environmental footprint.
Design and Aesthetics
Burnt wood siding offers a unique blend of rustic charm and modern sophistication, making it a versatile choice for a wide range of architectural styles. Its deep, rich tones and naturally textured surface add depth and visual interest to any exterior, enhancing both curb appeal and property value. The versatility of burnt wood allows for seamless integration with various design aesthetics, from traditional to contemporary.
Burnt wood siding’s aesthetic appeal stems from its ability to evoke a sense of warmth, history, and natural beauty. The process of Shou Sugi Ban (the traditional Japanese method of charring wood) creates a visually striking surface with a range of tones, from deep charcoal grays to rich browns and blacks. This variation in color adds texture and complexity, making it a visually engaging exterior cladding option.
Burnt Wood Siding and Architectural Styles
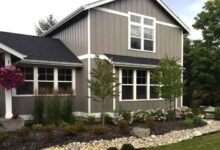
The inherent adaptability of burnt wood siding allows it to complement diverse architectural styles. In a modern farmhouse, for instance, the dark, textured surface of the siding can create a stunning contrast against crisp white trim and large windows, emphasizing the clean lines and simple elegance of the design. Conversely, on a rustic cabin, the charred wood seamlessly blends with the natural surroundings, enhancing the cozy and inviting atmosphere. Even in contemporary homes, burnt wood siding can add a touch of warmth and texture, balancing the sleek lines and minimalist aesthetic with a natural element. A contemporary home might use burnt wood as an accent wall, contrasting it with sleek metal or glass features.
Integrating Burnt Wood Siding with Other Exterior Materials
The beauty of burnt wood siding lies in its ability to harmonize with a variety of other exterior materials. Its deep, earthy tones pair exceptionally well with the natural tones of stone, creating a sophisticated and visually appealing contrast. Imagine a home with a stone foundation, gradually transitioning to burnt wood siding on the upper levels. This creates a sense of grounded stability and refined elegance. Similarly, burnt wood complements brick beautifully, particularly when used in a complementary color palette. The textural contrast between the smooth brick and the charred wood adds depth and visual interest. A combination of brick and burnt wood can create a classic yet modern feel, particularly when paired with strategically placed landscaping.
Visual Examples of Burnt Wood Siding in Various Contexts
Consider a modern farmhouse featuring burnt wood siding as the primary cladding material. The deep charcoal gray of the siding is offset by crisp white trim around the windows and doors, creating a clean, contemporary feel while retaining the rustic charm of the wood. The landscaping might incorporate native plants and grasses, further enhancing the natural aesthetic.
Next, envision a rustic cabin nestled in a wooded area. The burnt wood siding blends seamlessly with the surrounding trees and foliage, creating a harmonious and inviting atmosphere. The deep brown and black tones of the siding are accentuated by the natural light filtering through the trees. A stone chimney and a metal roof complete the rustic aesthetic.
Finally, picture a contemporary home with a sleek, minimalist design. A single wall of burnt wood siding acts as a striking accent, contrasting sharply with the clean lines and smooth surfaces of the other materials. This creates a unique and sophisticated look, blending the warmth of natural wood with the cool elegance of modern design. The rest of the exterior could be clad in concrete or metal panels.
Ultimately, burnt wood siding presents a compelling alternative to traditional siding options. Its unique visual appeal, coupled with its impressive durability and relatively low maintenance requirements, makes it a worthwhile investment for homeowners seeking a distinctive and long-lasting exterior finish. By carefully considering the factors Artikeld in this guide – from choosing the right wood type and burning technique to planning for installation and budgeting – you can successfully integrate burnt wood siding into your project, creating a stunning and enduring home exterior.
FAQ Guide
Can burnt wood siding be used in all climates?
While durable, its performance varies depending on climate. Extremely harsh conditions might require more frequent maintenance.
How flammable is burnt wood siding?
The charring process reduces flammability, but it’s still wood and should be treated with fire retardants and comply with local building codes.
Does burnt wood siding attract insects?
Properly treated and maintained burnt wood siding is less susceptible to insect infestation than untreated wood, but regular inspections are recommended.
What about painting or staining burnt wood siding?
While not necessary, you can apply a sealant to enhance protection. Painting or staining will alter the natural aesthetic.
Can I install burnt wood siding myself?
While possible for DIYers, professional installation ensures proper technique and longevity. Consider your skill level and the project’s complexity.
